Tag

How to Archives - Gurlinterrupted

FASHION DIY: Needle Felting Heart Elbow Patches

fashion, DIY, Elbow Patches, Needle Felting, How To, Tutorial, fashion blog nz, style blog nz, beauty blog nz, New Zealand PR, beauty media, fashion media, angie fredatovich, sweater, heels, clothes

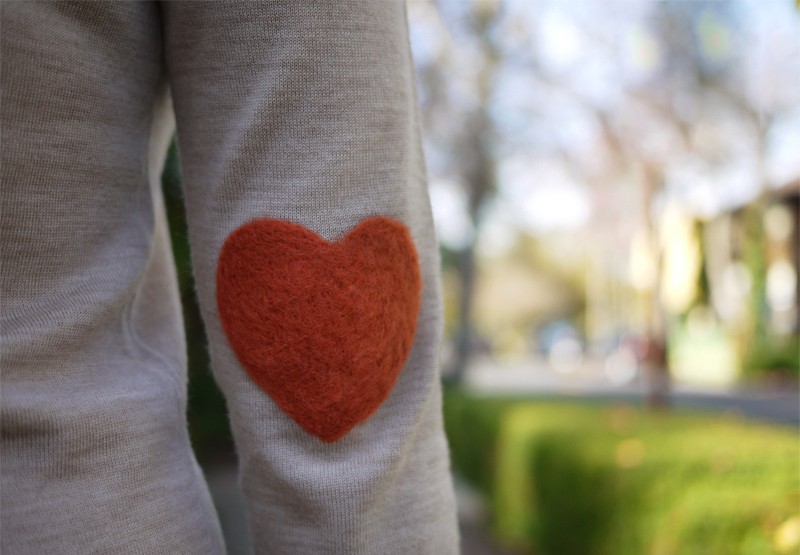
I stumbled (literally – I love ‘Stumbleupon.com’) across this Heart Elbow Patch DIY tutorial by Erica of ‘honestlyWTF’ a couple of years ago and I’m determined to do this with one of my jumpers before winter comes to an end. I mean hey – all it entails is repeatedly stabbing a needle up and down into a piece of fabric, heck yes I can do that. Here’s Erica’s ‘how to’ and exactly; what I plan to do myself this weekend!
fashion, DIY, Elbow Patches, Needle Felting, How To, Tutorial, fashion blog nz, style blog nz, beauty blog nz, New Zealand PR, beauty media, fashion media, angie fredatovich, sweater, heels, clothes

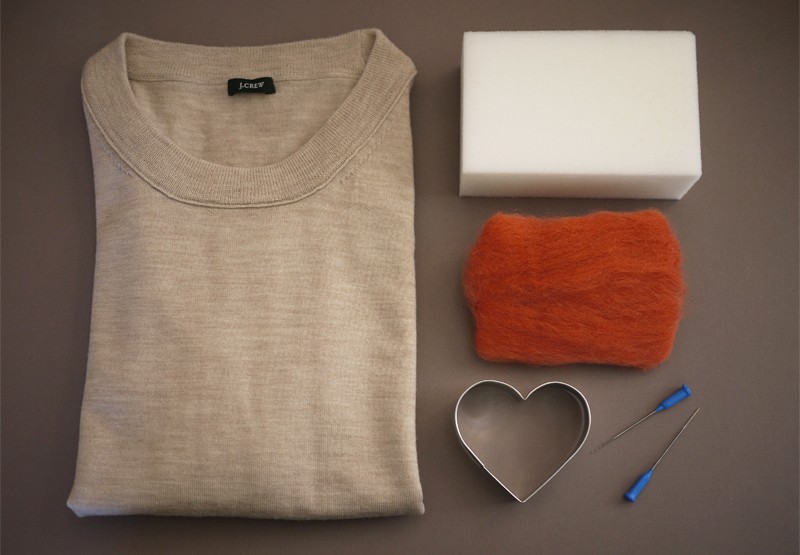
Here’s what you’ll need (most of which you can get from Spotlight or The Warehouse)

  • wool sweater
  • 36 gage felting needle
  • piece of dense foam cut to size (or a needle mat)
  • some wool roving
  • a 3” (or thereabouts) cookie cutter
  • an iron

fashion, DIY, Elbow Patches, Needle Felting, How To, Tutorial, fashion blog nz, style blog nz, beauty blog nz, New Zealand PR, beauty media, fashion media, angie fredatovich, sweater, heels, clothes

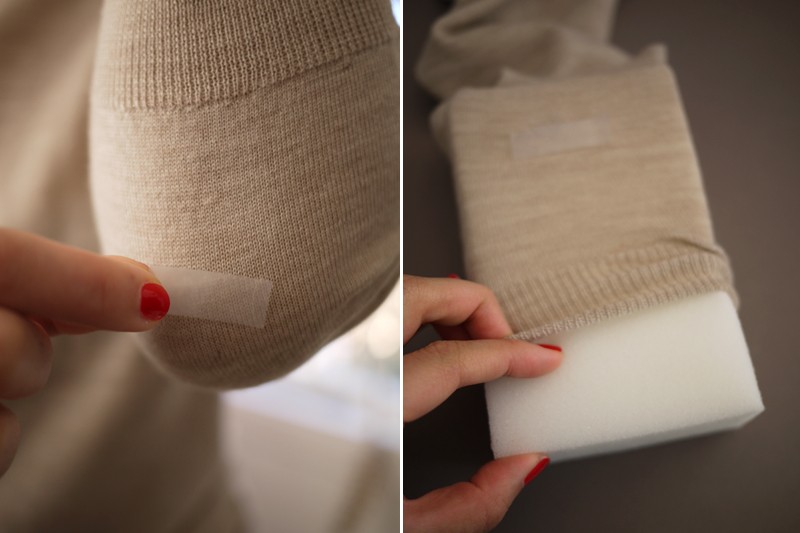
With the sweater on, place a piece of tape about half an inch below the elbow. Do the same with the opposite elbow. Remove the sweater and insert the foam block into one of the sleeves.
fashion, DIY, Elbow Patches, Needle Felting, How To, Tutorial, fashion blog nz, style blog nz, beauty blog nz, New Zealand PR, beauty media, fashion media, angie fredatovich, sweater, heels, clothes

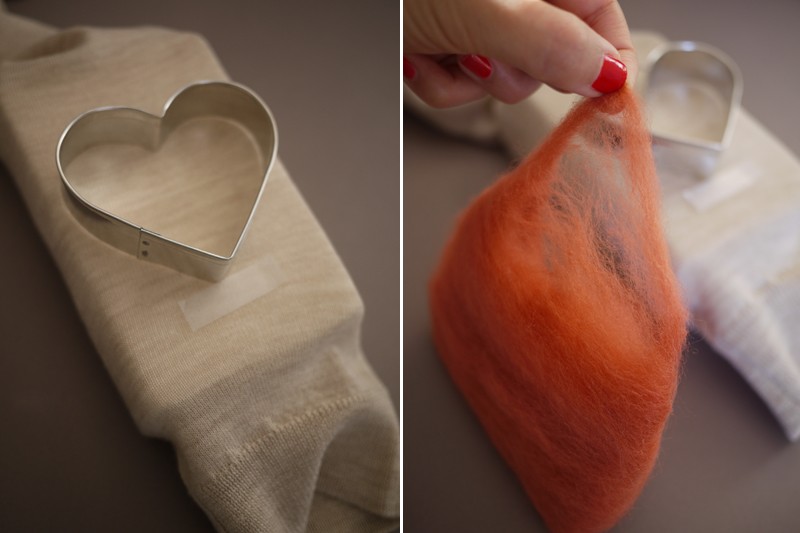
Align and centre the bottom of the cookie cutter along the top of the tape. Pinch off a few tufts of wool roving.
fashion, DIY, Elbow Patches, Needle Felting, How To, Tutorial, fashion blog nz, style blog nz, beauty blog nz, New Zealand PR, beauty media, fashion media, angie fredatovich, sweater, heels, clothes

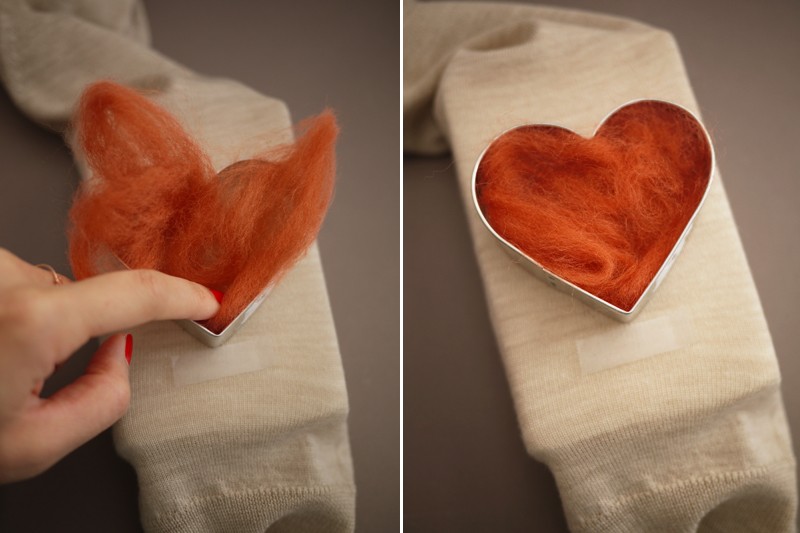
Fill the cutter, spreading out the wool fibres evenly.
fashion, DIY, Elbow Patches, Needle Felting, How To, Tutorial, fashion blog nz, style blog nz, beauty blog nz, New Zealand PR, beauty media, fashion media, angie fredatovich, sweater, heels, clothes

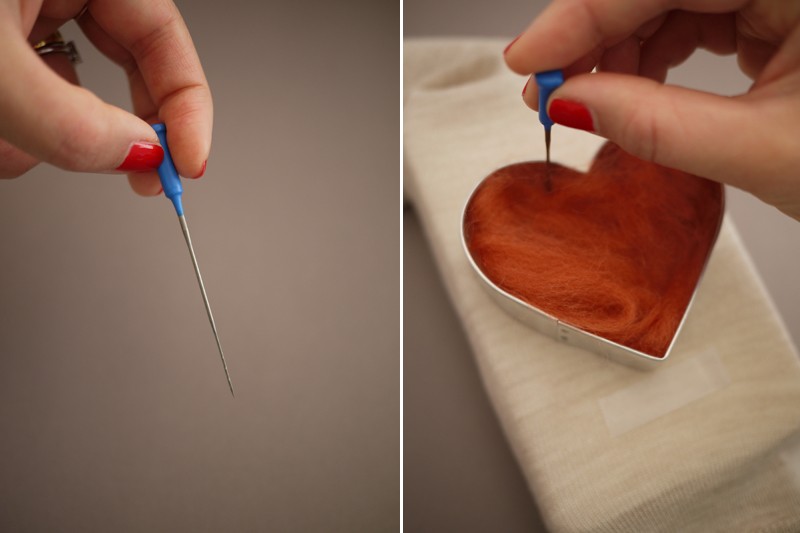
At the base of all felting needles are tiny, sharp burrs, which grab and interlock the wool fibres. While holding the needle vertically, repeatedly stab it into the wool roving and through the sweater. I found it easier to work around the outer perimeter of the cutter first and then work my way inwards. Important tip: To prevent breaking the needle, always keep the needle upright and never at an angle. And don’t forget to pay careful attention to your fingers while felting as the needle is extremely sharp!
fashion, DIY, Elbow Patches, Needle Felting, How To, Tutorial, fashion blog nz, style blog nz, beauty blog nz, New Zealand PR, beauty media, fashion media, angie fredatovich, sweater, heels, clothes

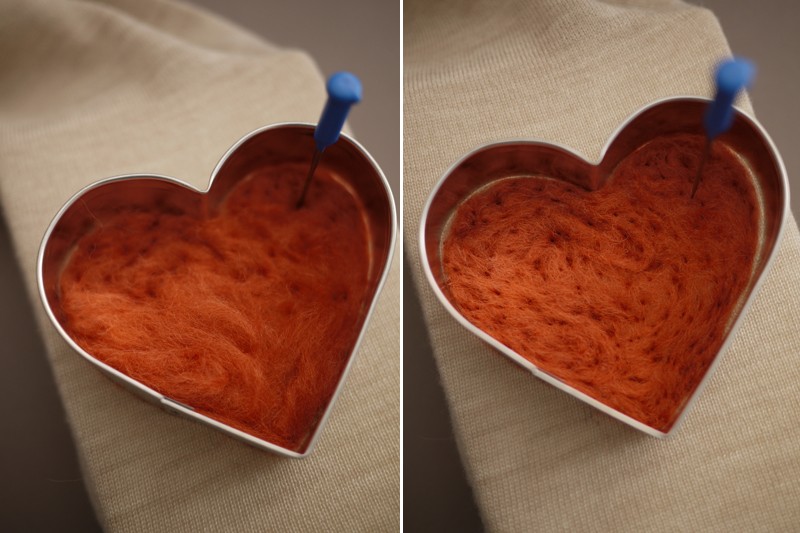
Continue stabbing away until the surface is flat and even. Fun, right?
fashion, DIY, Elbow Patches, Needle Felting, How To, Tutorial, fashion blog nz, style blog nz, beauty blog nz, New Zealand PR, beauty media, fashion media, angie fredatovich, sweater, heels, clothes

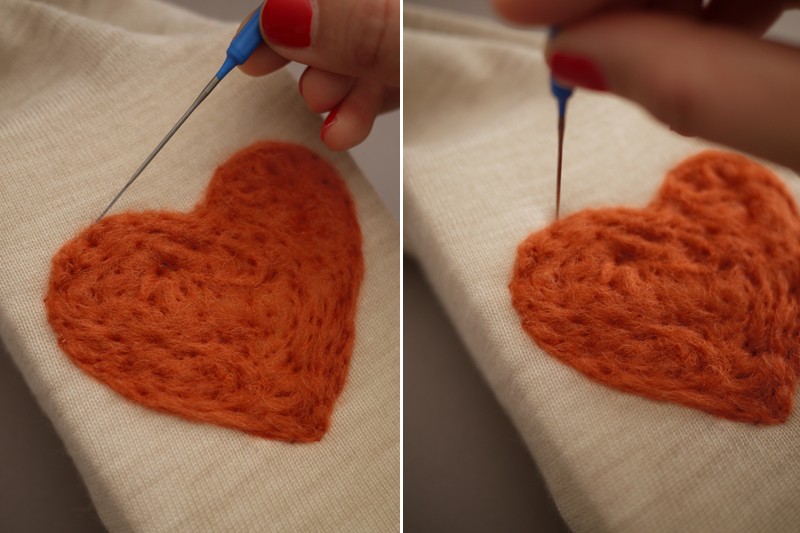
Remove the cutter and use the tip of the needle to reign in any stray fibres, if necessary. Don’t worry about the holes as they will be mended later.
fashion, DIY, Elbow Patches, Needle Felting, How To, Tutorial, fashion blog nz, style blog nz, beauty blog nz, New Zealand PR, beauty media, fashion media, angie fredatovich, sweater, heels, clothes

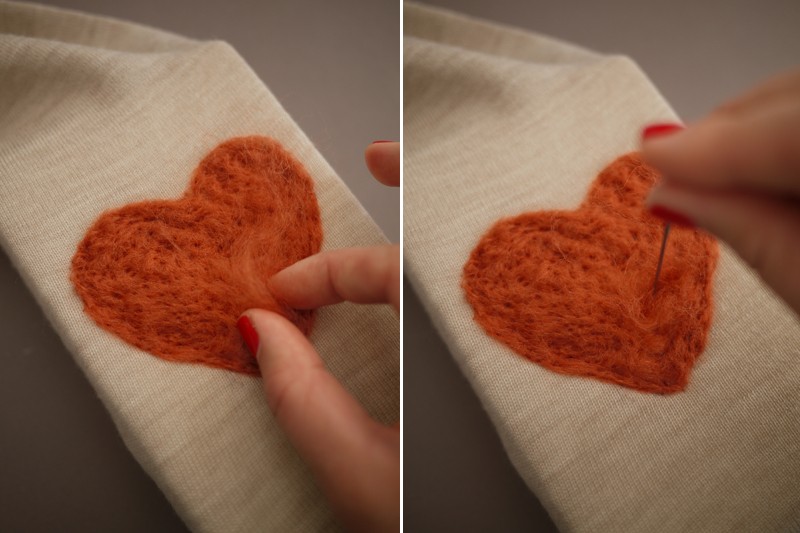
Patch up any bare or uneven spots by adding more wool roving where needed.
fashion, DIY, Elbow Patches, Needle Felting, How To, Tutorial, fashion blog nz, style blog nz, beauty blog nz, New Zealand PR, beauty media, fashion media, angie fredatovich, sweater, heels, clothes

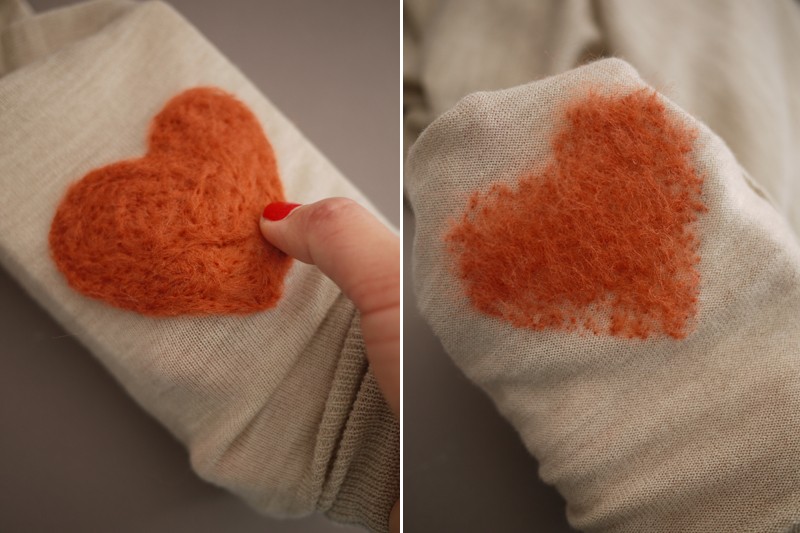
Carefully peel the sweater away from the foam. Notice that the fibres have transferred through to the backside of the sweater.
fashion, DIY, Elbow Patches, Needle Felting, How To, Tutorial, fashion blog nz, style blog nz, beauty blog nz, New Zealand PR, beauty media, fashion media, angie fredatovich, sweater, heels, clothes

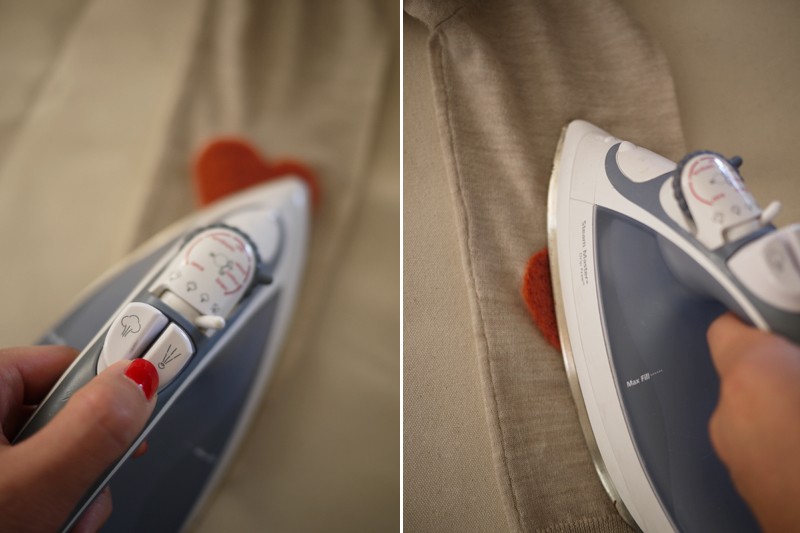
To smooth and set the patch, spritz with water and press with an iron on the wool setting.
fashion, DIY, Elbow Patches, Needle Felting, How To, Tutorial, fashion blog nz, style blog nz, beauty blog nz, New Zealand PR, beauty media, fashion media, angie fredatovich, sweater, heels, clothes

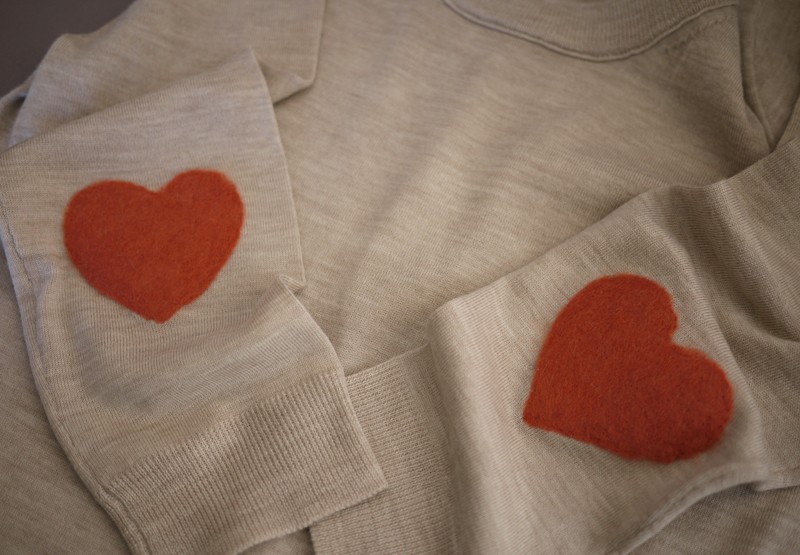
Repeat the same steps the other sleeve.
fashion, DIY, Elbow Patches, Needle Felting, How To, Tutorial, fashion blog nz, style blog nz, beauty blog nz, New Zealand PR, beauty media, fashion media, angie fredatovich, sweater, heels, clothes

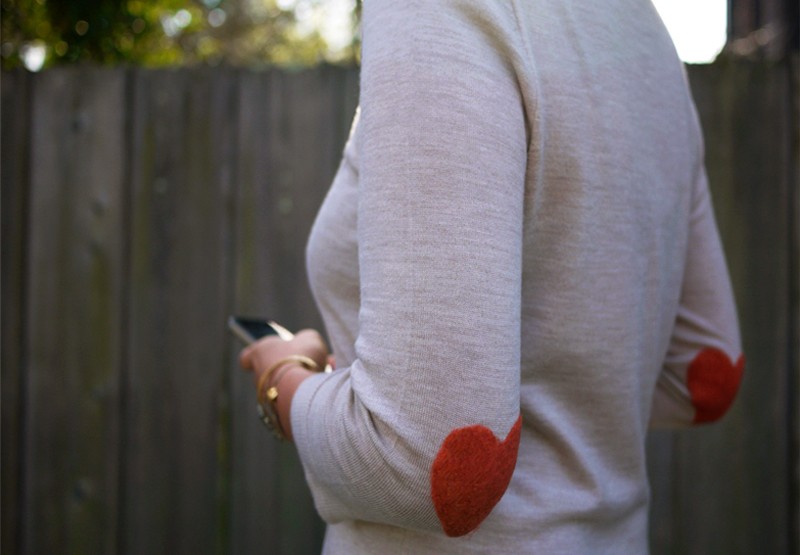
Viola! Your heart-shaped elbow patches are finished!
fashion, DIY, Elbow Patches, Needle Felting, How To, Tutorial, fashion blog nz, style blog nz, beauty blog nz, New Zealand PR, beauty media, fashion media, angie fredatovich, sweater, heels, clothes

Ange x
Gurlinterrupted
A Girl Interrupted By Fashion, Beauty & Anything Pretty That Catches My Eye

Gurlinterrupted Facebook, beauty blog nz, fashion blog nz, style blog nz, heels, shoes, clothes,

Does Your Keyboard Need A Makeover?

WASHI TAPE KEYBOARD nz style beauty blogger

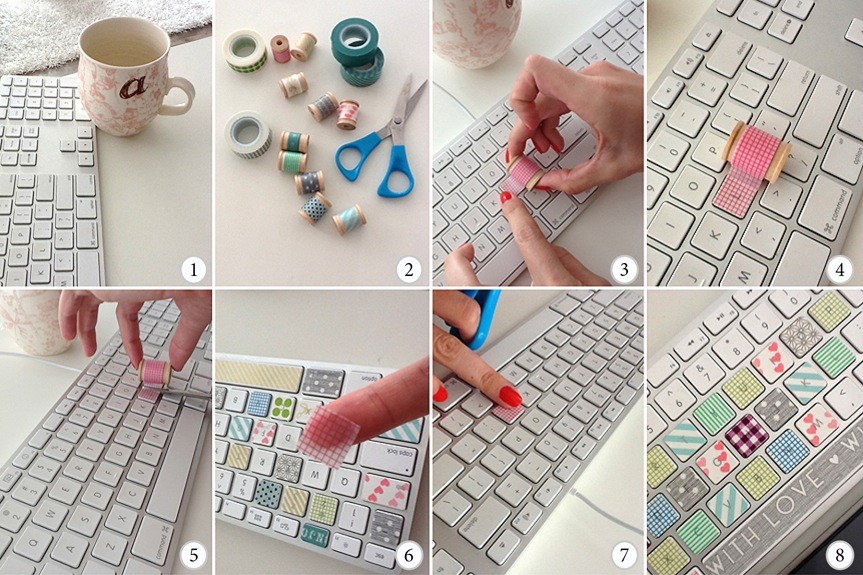
I know washi tape has been around for quite some time now and yes, admittedly I’ve given more than ‘just a few’ of my household and office items a washi tape makeover, but this ‘Keyboard Makeover’ I found on designaglow.com is pretty much THE coolest thing I’ve ever seen done with washi tape and I’m about to apply this to my MacBook Pro, the office Mac, my sisters laptop, my guys desktop Mac (he doesn’t know this yet – probably best I make it a ‘surprise makeover’ when he’s not home, unsure he will be as delighted with this cutesy makeover as I am).

Check out this super easy step-by-step guide:

Washi Tape Keyboard Tutorial NZ Style Blogger

Source: designaglow.com

Supplies: 
1. Washi tape: you can find this at your local craft store or on etsy.com
2. Scissors
3. Keyboard – preferably one with flat keys
4. Time!

Directions:
1. Thoroughly clean keys with rubbing alcohol and a q-tip.
2. Brainstorm a pattern or create a random design.
3. Align edge with corner of key.
4. Unravel and adhere across key.
5. Snip at edge and remove.
6. Trim corners and excess.
7. Neatly re-stick to key.
8. Repeat!

Ange xx

A Girl Interrupted By Fashion, Beauty & Anything Pretty That Catches My Eye
Don’t forget to ‘Like’ Gurlinterrupted on FACEBOOK and follow my blog by entering your email address on the homepage here on my site.

DIY: The Commando-M/Blogger Collab – A Modern Twist On The Oxford.

Commando-M Blogger Collab Kathryn Wilson Shoe Design

Commando-M Blogger Collaboration Kathryn Wilson Shoe Design

As some of you may already know, Commando-M sneakers are about to re-launch! Commando-M were one of the leading New Zealand shoe companies in the 80’s (I’m pretty sure nearly every ‘child of the 80’s’ had a pair of these super cute sneakers) and I’m happy to report – they’re making a comeback!

Commando-M has already collaborated with leading shoe designer Kathryn Wilson and now Commando-M is collaborating with a selection of New Zealand Fashion Bloggers. Gurlinterrupted was lucky enough to be one of those bloggers invited to design a pair of Commando-M’s and you can now see my design and many others, on Commando-M’s Facebook page: COMMANDO-M’s FACEBOOK PAGE

Here’s a simple step by step guide to re-creating my sneaker design – A modern twist on the Oxford.

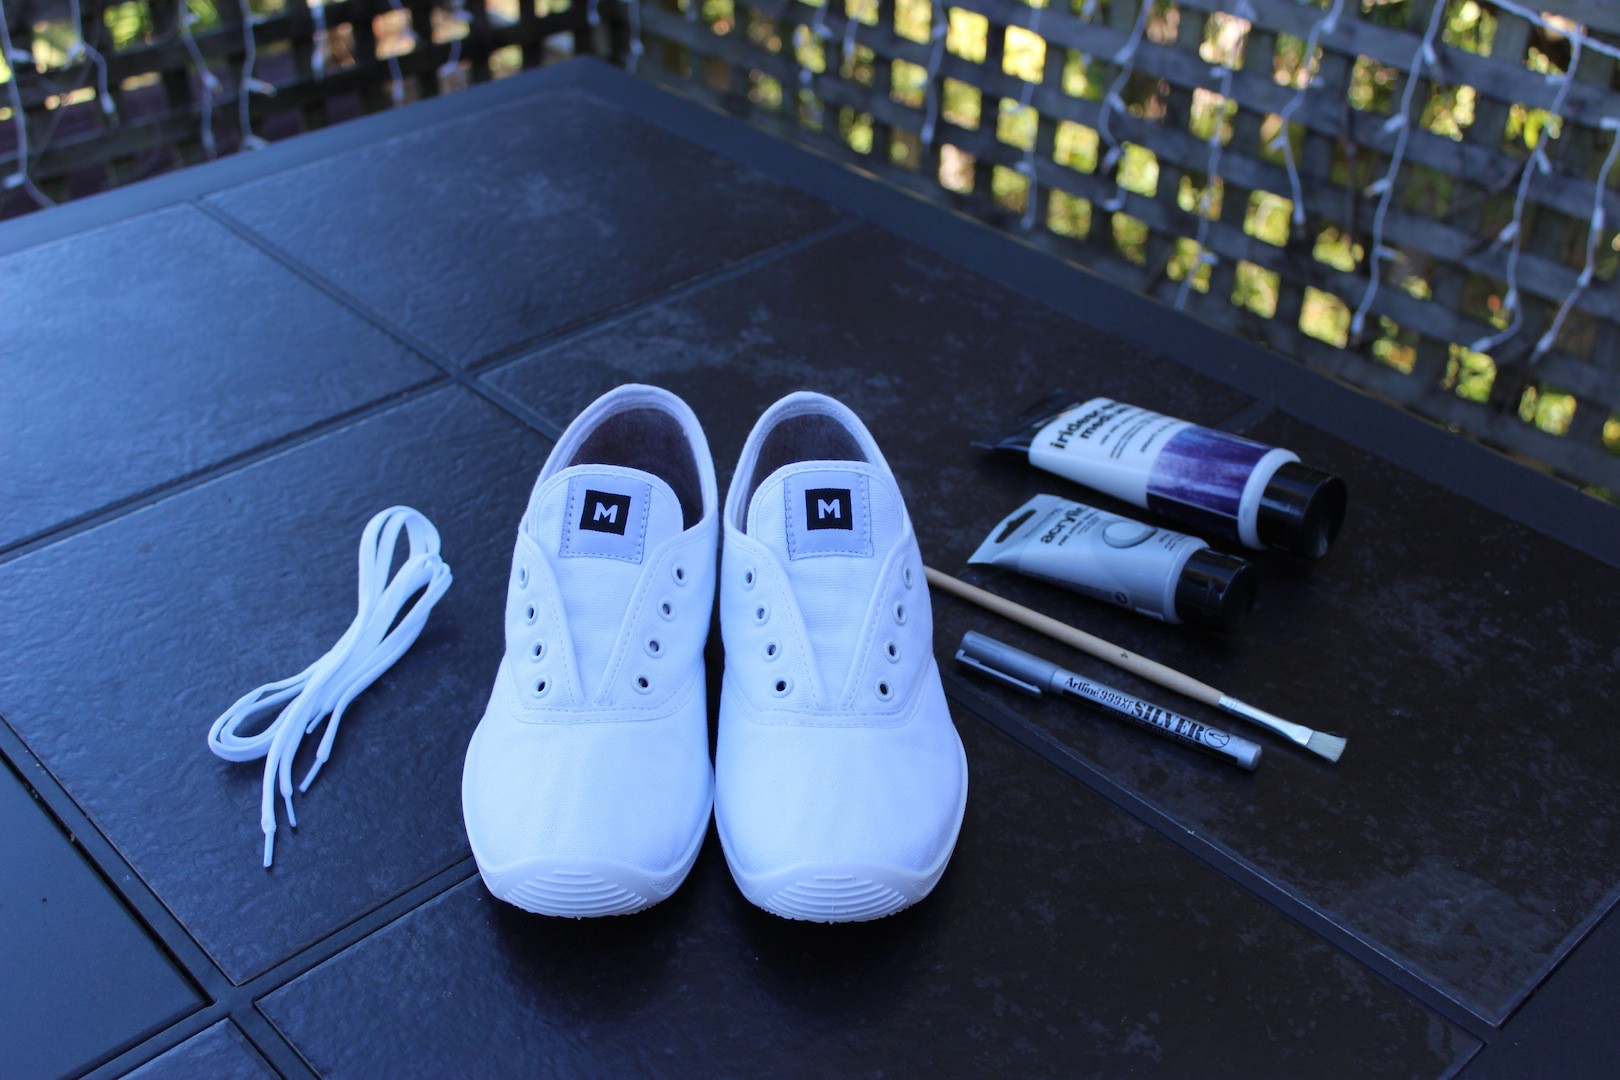
You will need:
A Pair of Sneakers
A Silver Metallic Pen
2 Paintbrushes – A fine and a medium tipped brush
Silver Acrylic Paint
Iridescent Mixing Medium (paint) this will create a true metallic silver paint
A small dish to mix your paints in
Masking Tape
Silver Ribbon
Super Glue

Guide:
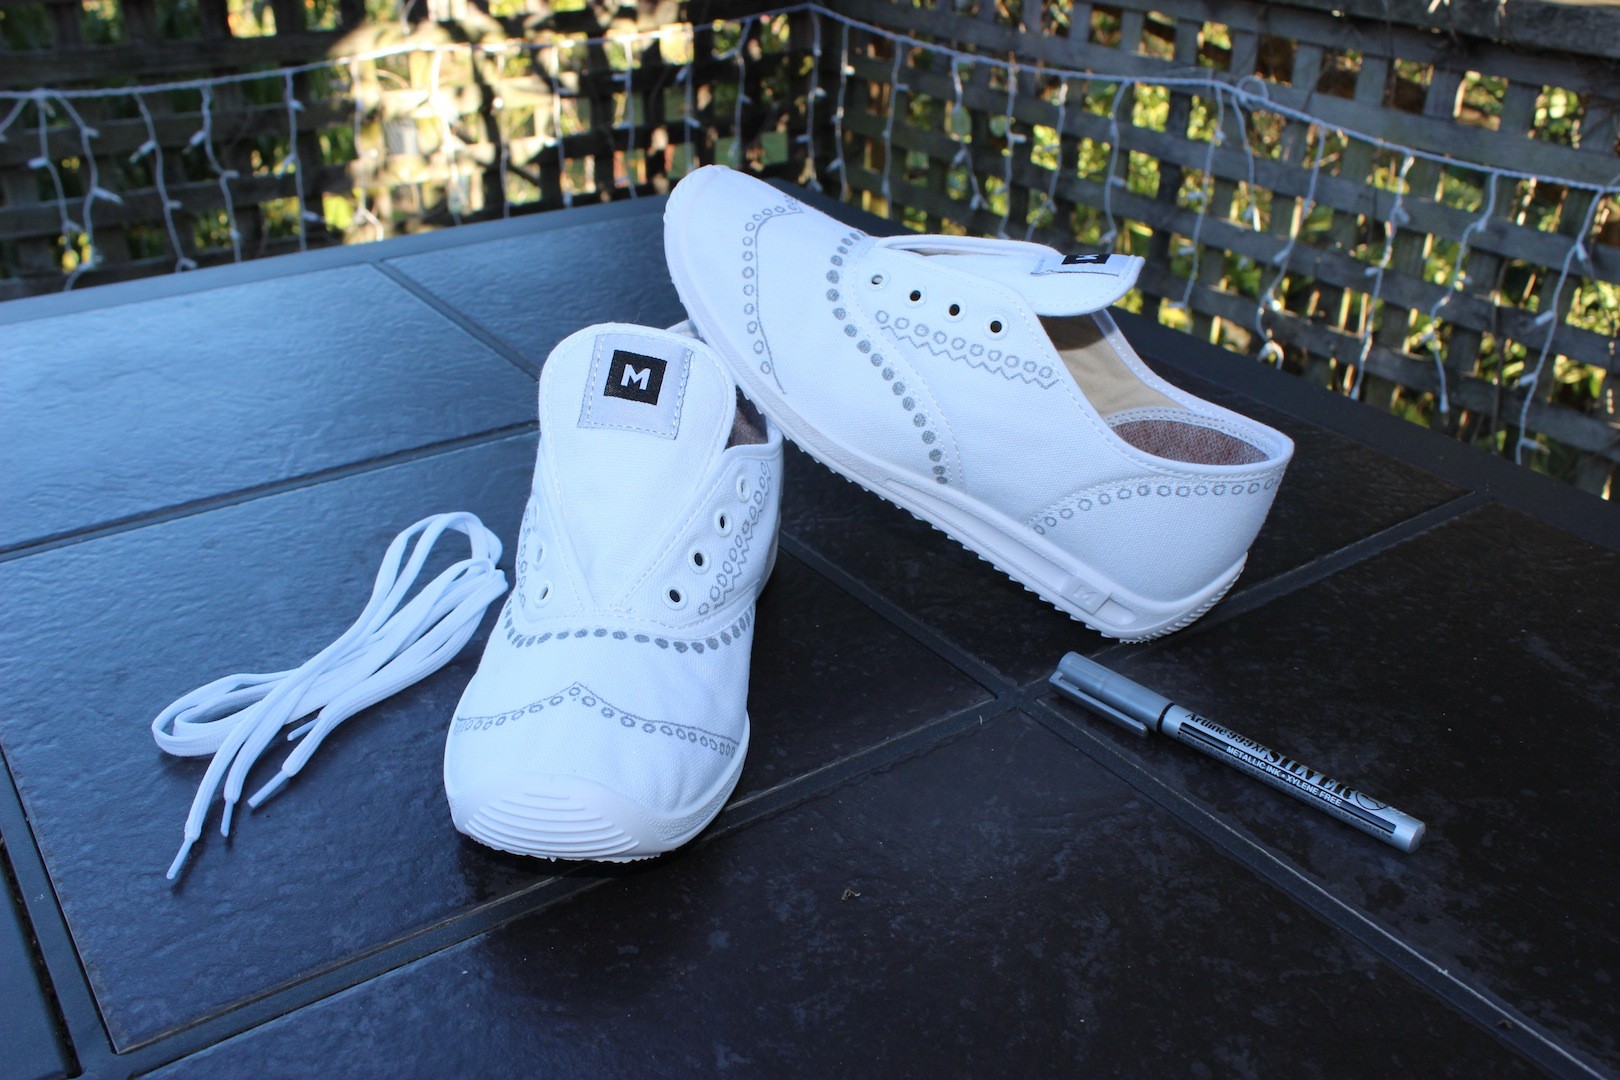
Take a pair of white Commando-M’s (or whatever sneakers you are re-designing) and remove the laces.  Here’s a ‘before’ picture of my Commando M’s:
Commando-M Blogger Collab Kathryn Wilson Shoe Design

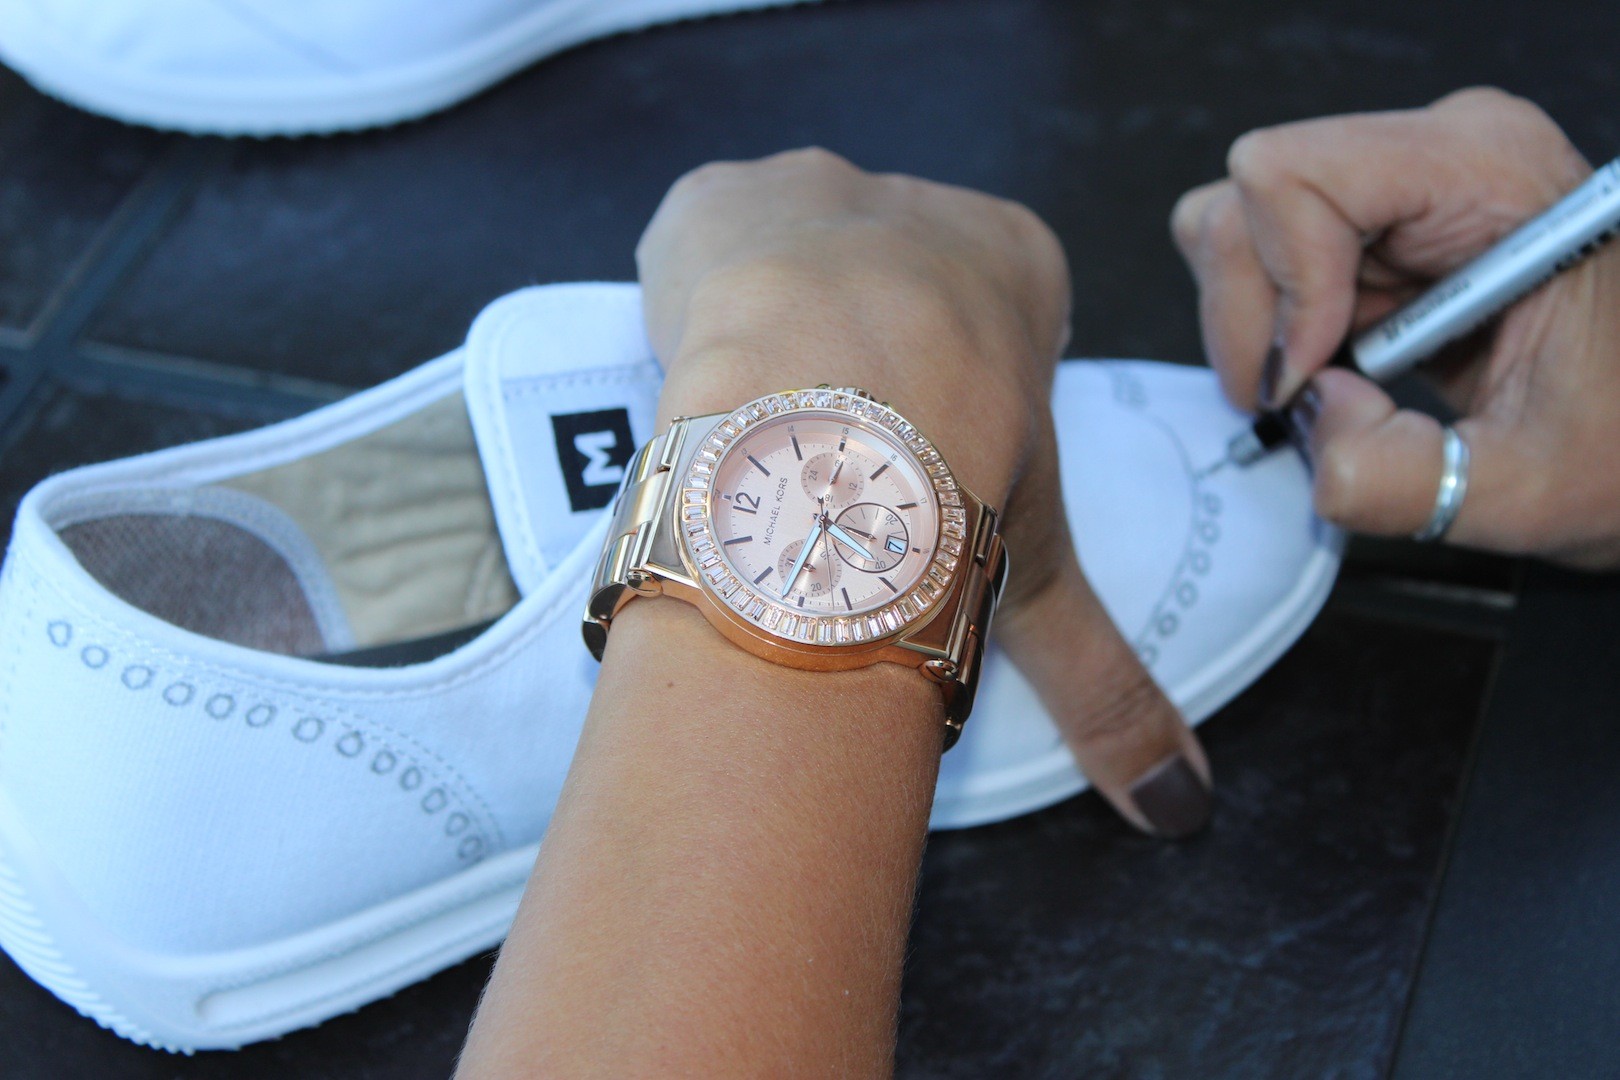
Draw on the design using the Silver Metallic Pen. This will enable you to map out your concept using the same hues as the paint you will be using.
Commando-M Blogger Collab Kathryn Wilson Shoe Design

Your design should now be drawn out evenly across both shoes – something like this:
Commando-M Blogger Collab Kathryn Wilson Shoe Design
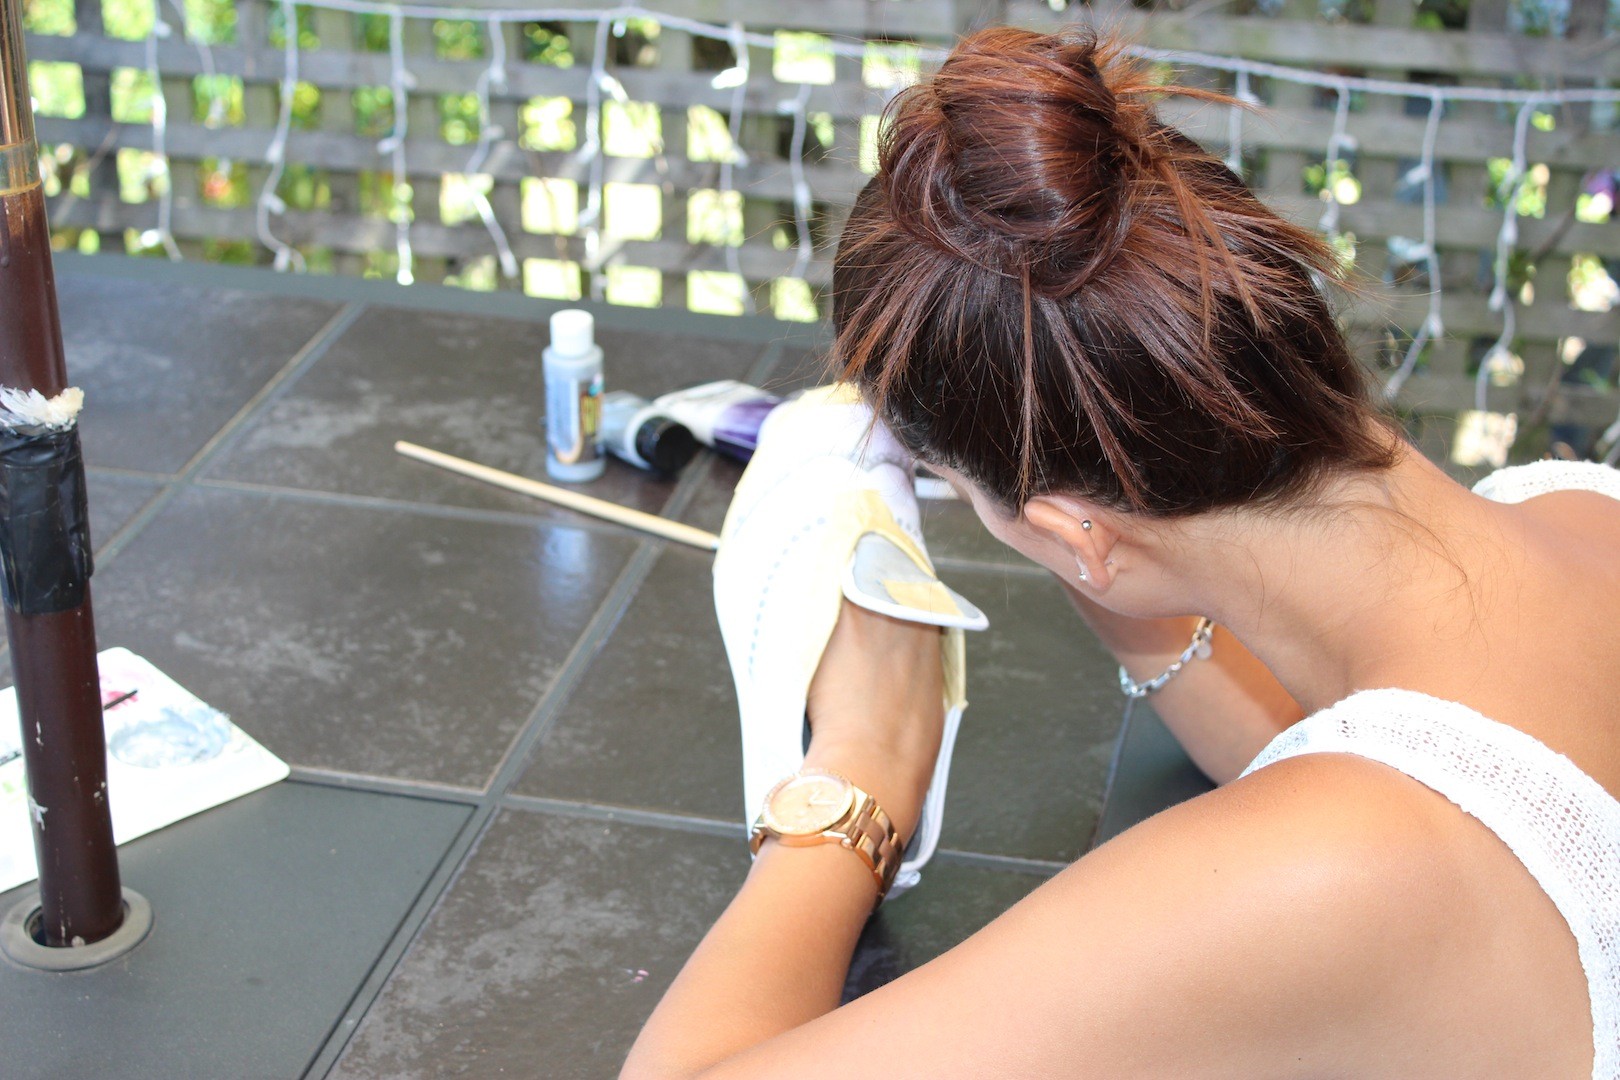
It’s time to start with the Masking Tape.  Basically you want to tape around all the parts of the shoe you DON’T want to get paint on.  I taped up the eyelets, the edges of the sole and around the edging close to where I was painting.
Commando-M Blogger Collab Kathryn Wilson Shoe Design
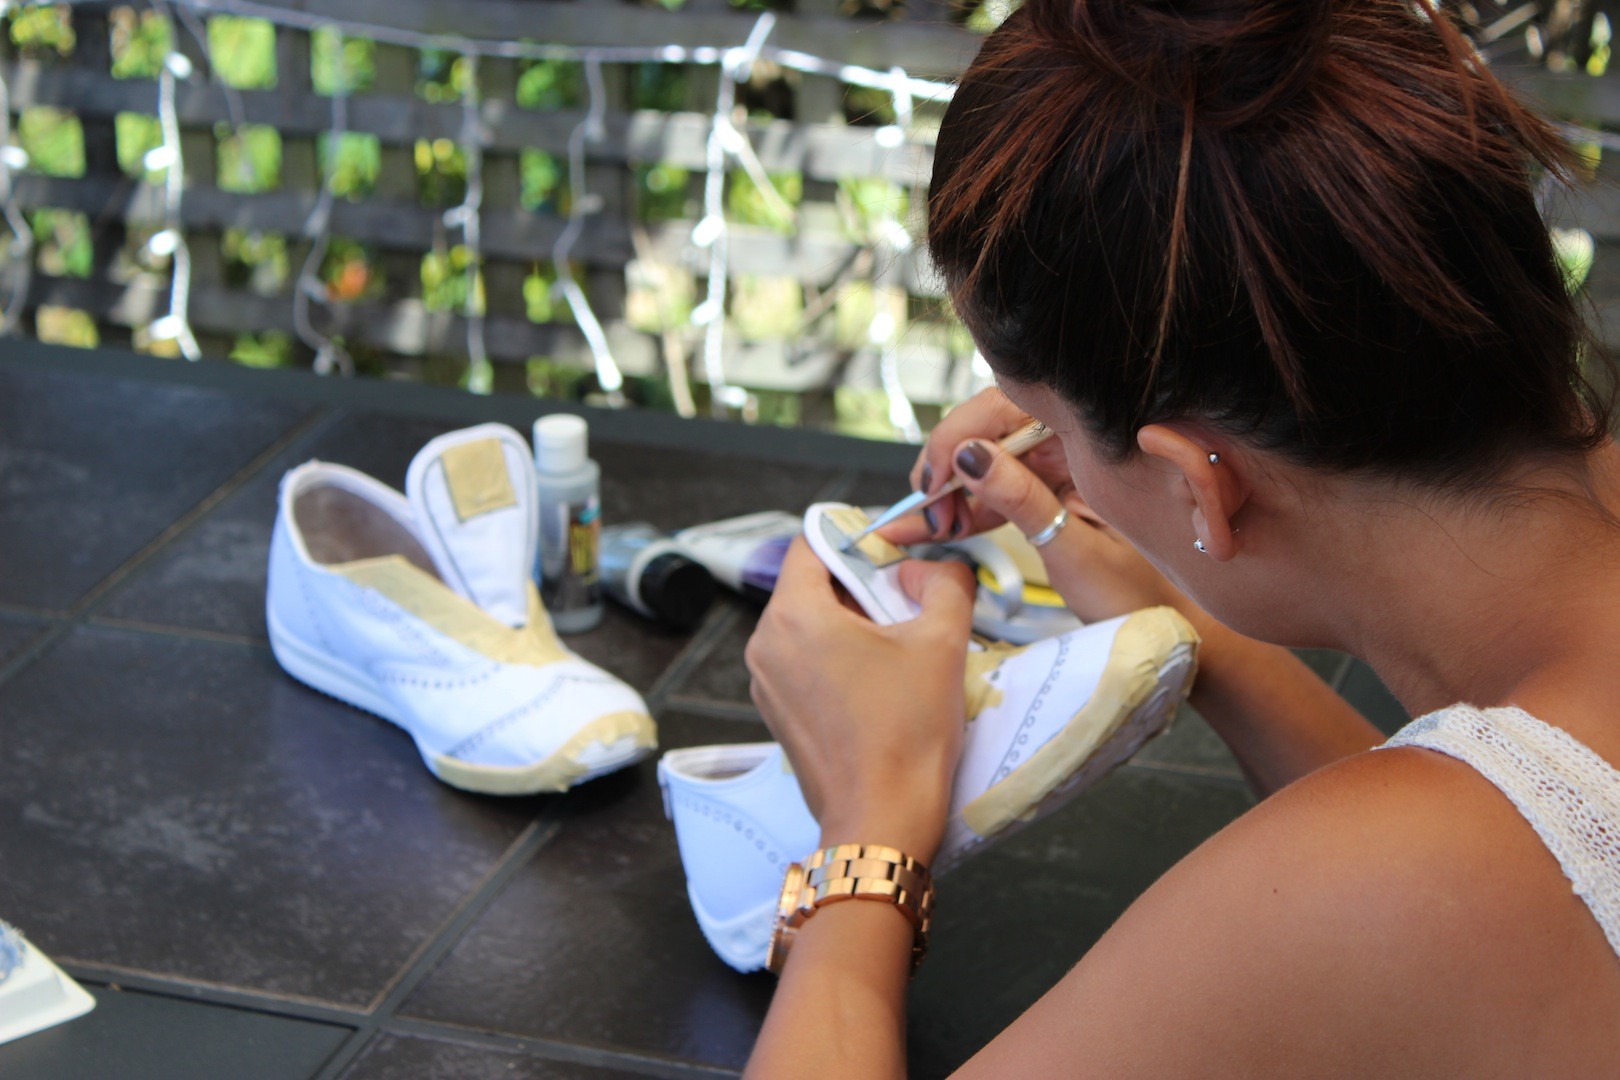
Now mix together your silver acrylic paint and iridescent mixing medium and start painting very carefully around the dotted design using a fine paintbrush (when painting the areas further away from the dotted design you can move to a larger paintbrush).
Commando-M Blogger Collab Kathryn Wilson Shoe Design
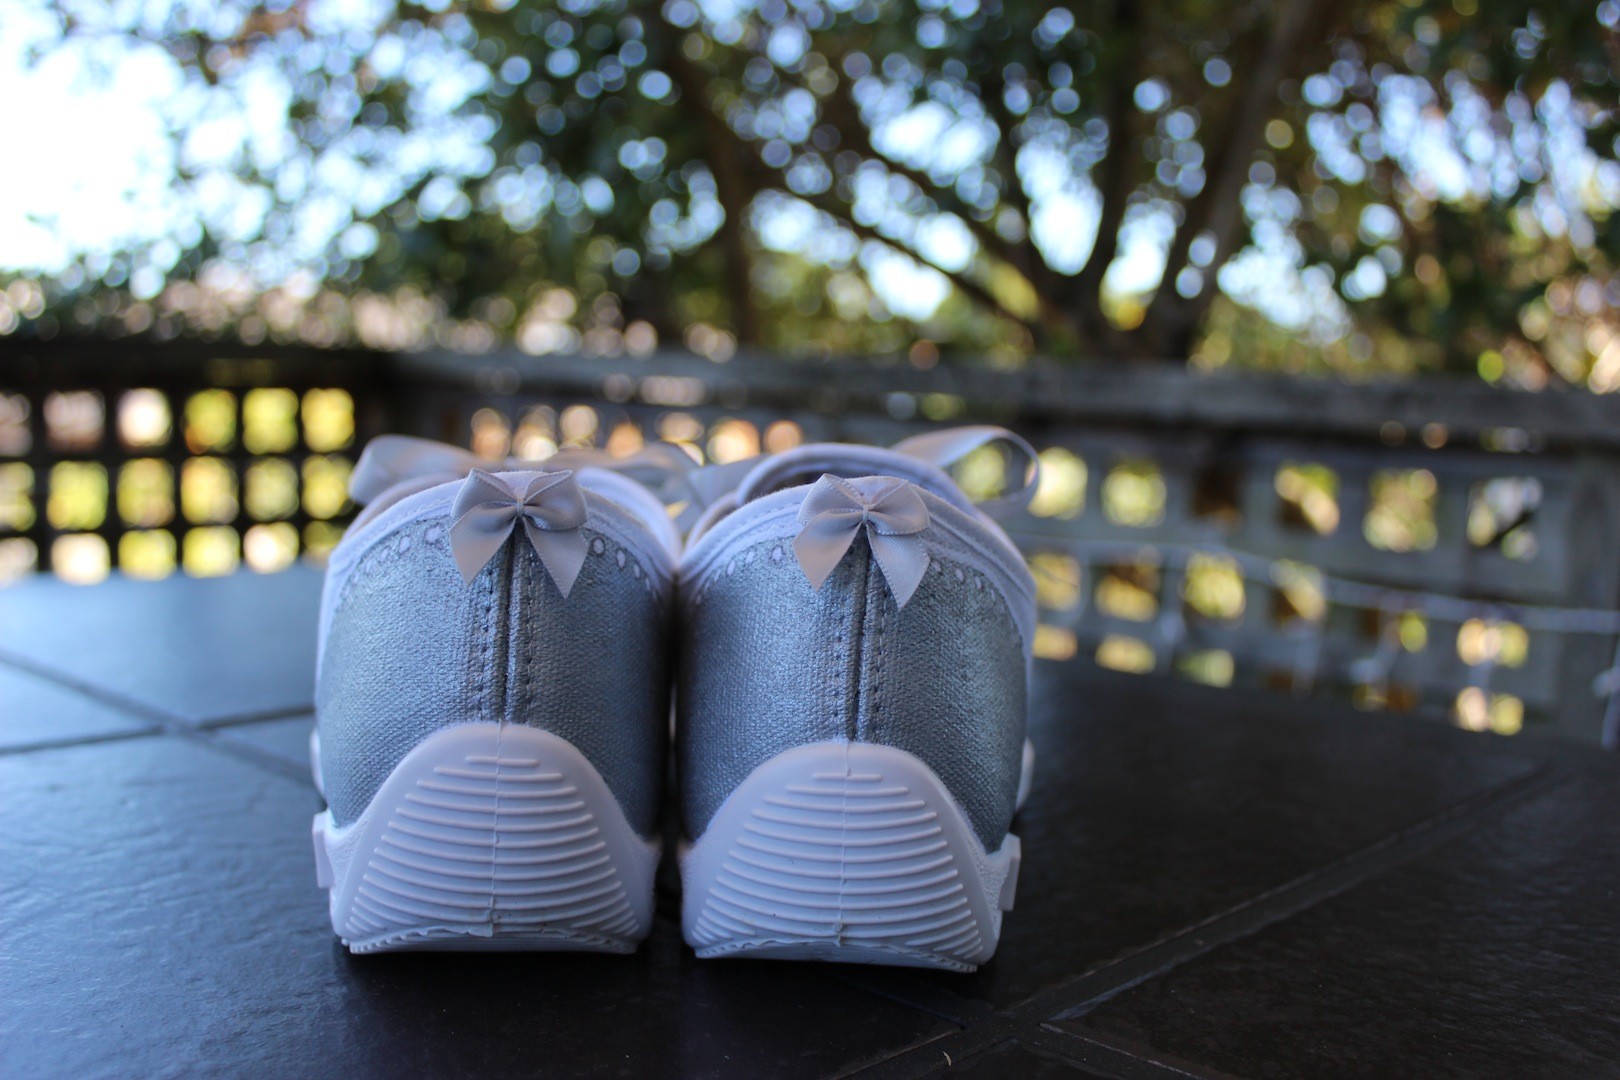
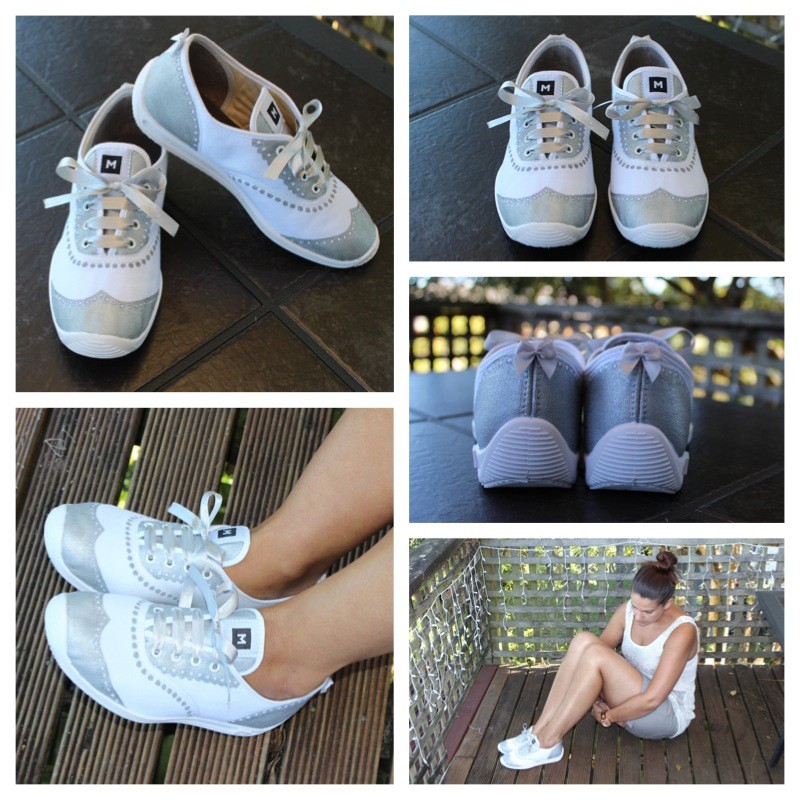
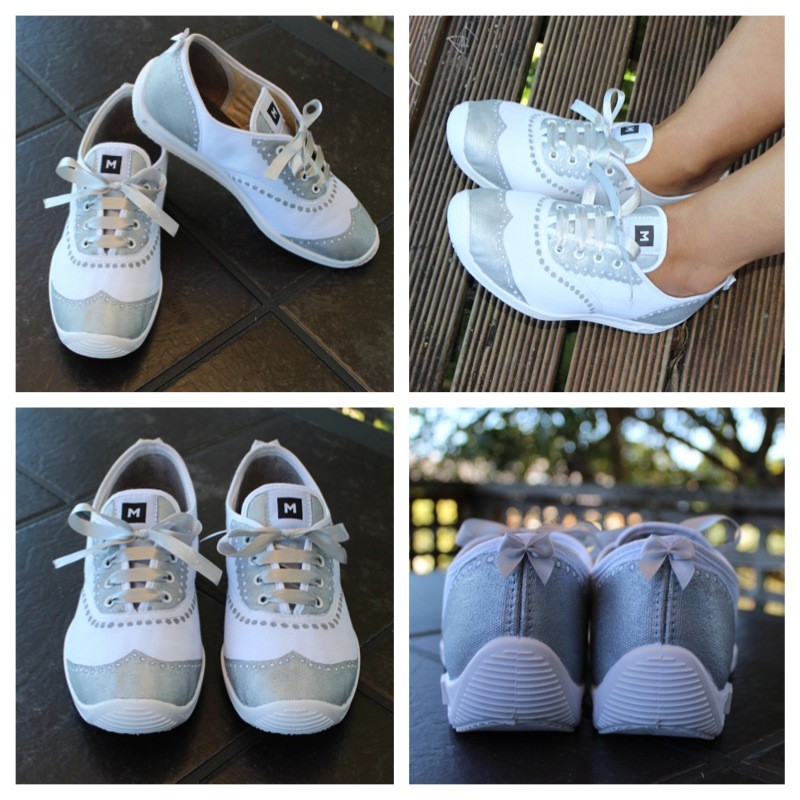
Allow paint to fully dry before removing the masking tape.  Add your finishing touches…. Take your silver ribbon, measure out the ribbon to the same size as the shoelaces you removed earlier and cut to size (I also lightly burnt the edge of the ribbon with a lighter to prevent fraying) and insert in place of the original shoelaces.  Create a small bow using the same silver ribbon and attach a bow onto the back heel of each shoe using quick drying Super Glue.
Commando-M Blogger Collab Kathryn Wilson Shoe Design
VOILA!  Oxford style sneakers.
Commando-M Blogger Collab Kathryn Wilson Shoe Design

Ange x
A Girl Interrupted By Fashion, Beauty & Anything Pretty That Catches My Eye

Don’t forget to ‘Like’ Gurlinterrupted on FACEBOOK and follow my blog by entering your email address on the homepage here on my site.

DIY Fashion Project: Trackie Pants to Cute Summer Boy Shorts (and there’s NO SEWING involved)…

Strut into summer by turning your favourite pair of trackie pants into sizzling boy shorts. The best part is THERE’S NO SEWING INVOLVED!!

These boy shorts are the brainchild of US based lingerie designer, Jenny Dombroski of Evlove Intimates; and this simple tutorial will show you how you too can create your very own unique pair of super cute summer boy shorts.

Materials:
Trackie/Workout pants
Ruler
Chalk
Scissors
Hemming tape*
Lace trim*
Parchment paper*
Ribbon*
Iron and ironing board
Safety pin

*You can get these items from stores such as Spotlight, Geoffs Emporium, Craft Stores, etc

Step by Step:

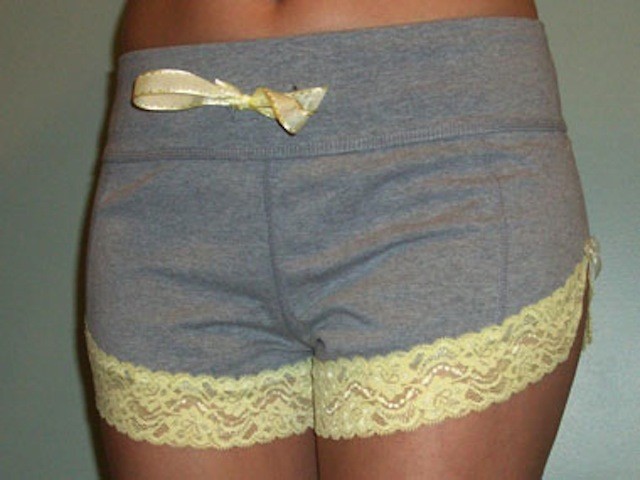
  1. Lay the tracksuit pants flat and measure your desired length (the inseam should be between one and a half and three inches); adding a curved slit at the outer leg is optional. Draw the cut line with chalk.
  2. Fold the sweatpants in half lengthwise and cut from the inseam outward.
  3. Slide one leg of the shorts onto your ironing board. Line the hemming tape along the bottom edge and place lace on top, covering the tape. Put parchment paper over it all and iron for eight seconds to adhere the lace. Repeat with other leg.
  4. Remove drawstring from shorts. Replace with a ribbon (use the safety-pin to guide the ribbon through the gap where you removed the drawstring from.  The safety-pin will make it easy to guide the ribbon around).

And… Super Cute Boy Shorts Complete!!

Ange x
A Girl Interrupted By Fashion, Beauty & Anything Pretty That Catches My Eye
Want to be kept up to date on all the latest and greatest? Follow my blog by entering your email address on my homepage under “Stay Tuned, Follow My Blog”. xx

Photo: Courtesy of Evlove Intimates

Catch A Falling Star – Makeup Tutorial On How To Stop Glitter Fallout

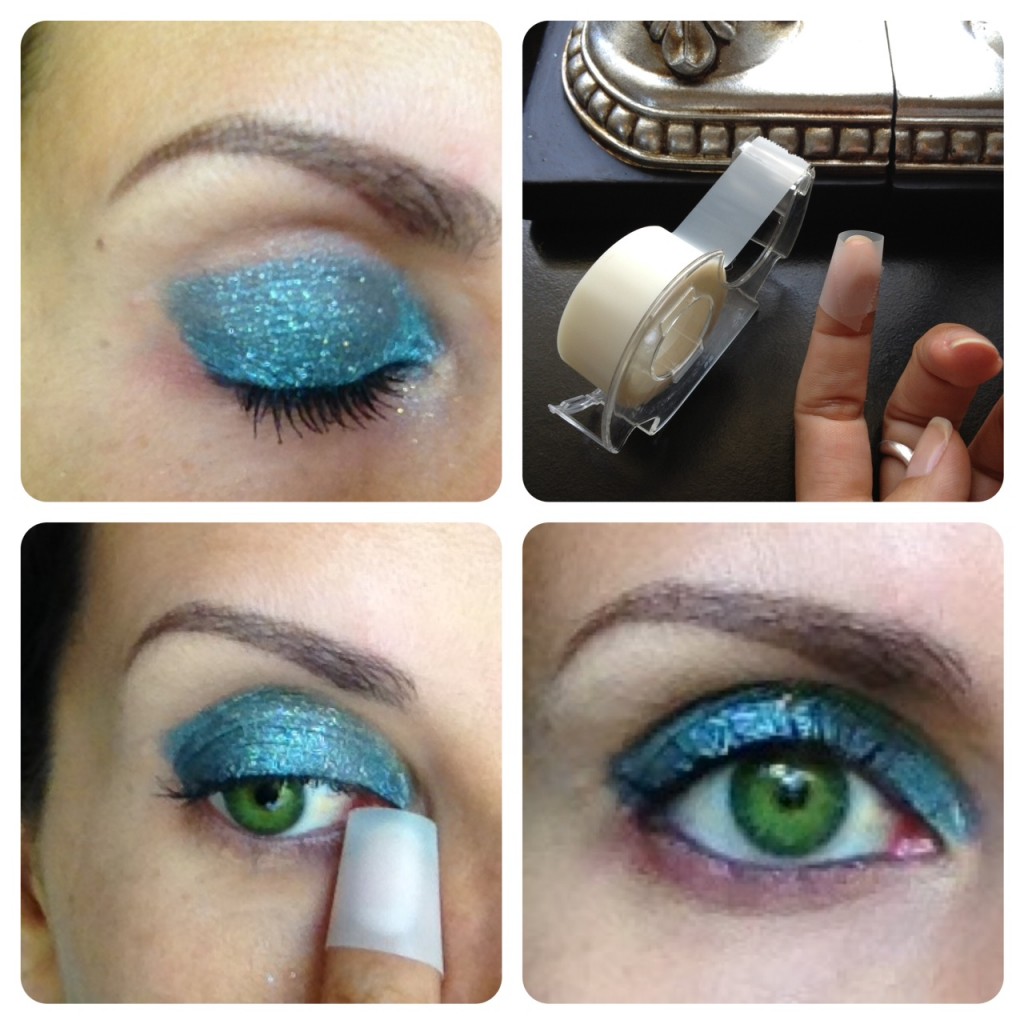
I love glittery eye make-up – I DON’T LOVE THE GLITTER FALLOUT!!  This little trick will allow you to remove the glitter fallout effectively, in less than a minute AND without ruining the rest of your makeup.

OK – see the small sparkly fallout, just under my eye? (in the top left corner picture) – this is what we are going to remove (and if you have more glitter fallout on your cheeks, you can remove this too by following these steps).

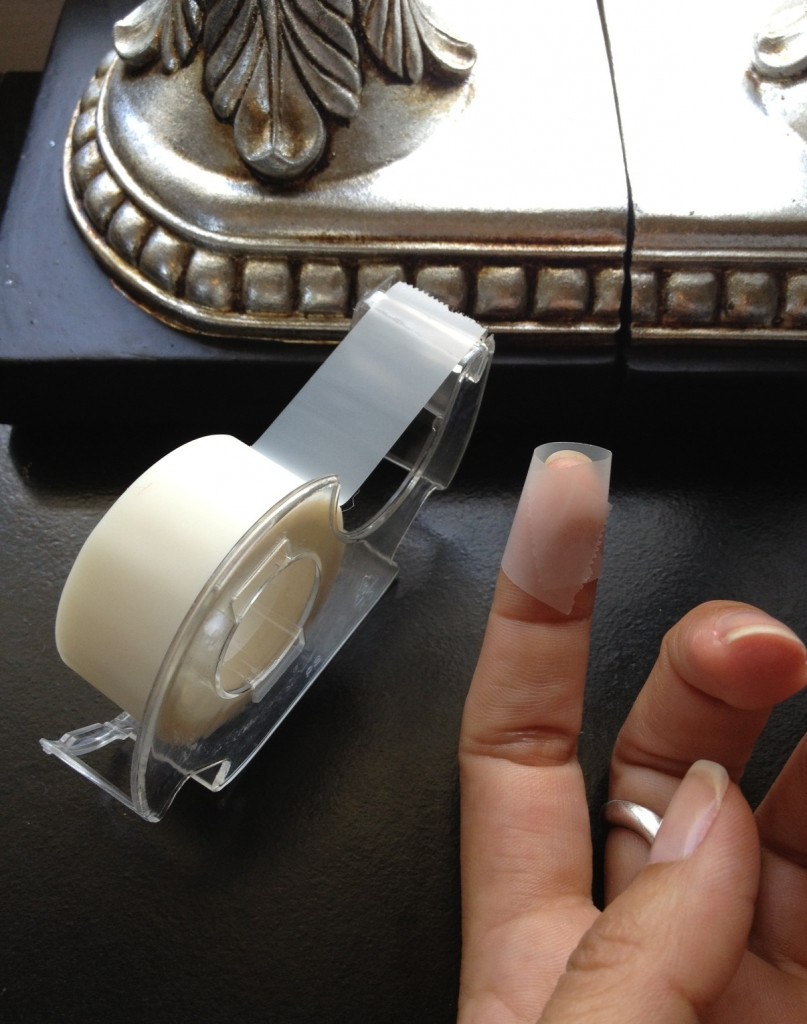
Tear off a piece of Scotch Tape or Removable Tape and wrap it around the tip of your finger with the sticky side facing out.

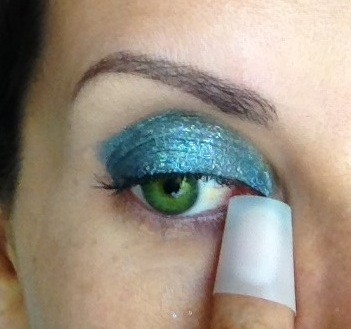
Firmly press the tape onto any fallen glitter and simply lift it off

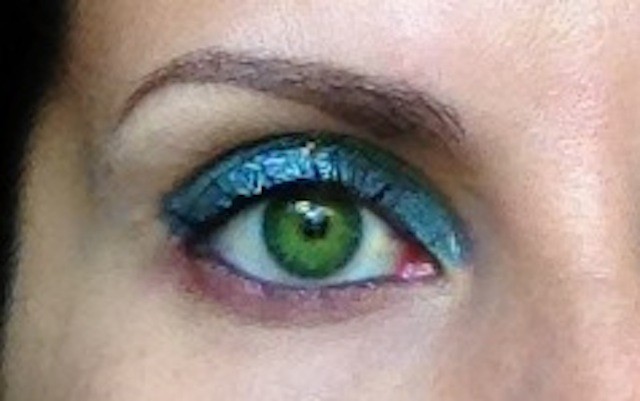
Voila!  No Glitter Fallout!!

Should you feel you need to – you can touch up any foundation that may have lifted off with the tape.  For the sake of this tutorial I didn’t bother with foundation, however I feel confident the tape shouldn’t disturb your makeup too much at all, as it’s not ever ruined my foundation in the past.

Glitter kisses xx

Ange 
A Girl Interrupted By Fashion, Beauty & Anything Pretty That Catches My Eye
Want to be kept up to date on all the latest and greatest? Follow my blog by entering your email address on my homepage under “Stay Tuned, Follow My Blog”. xx

The Prettiest Salad Of Them All…

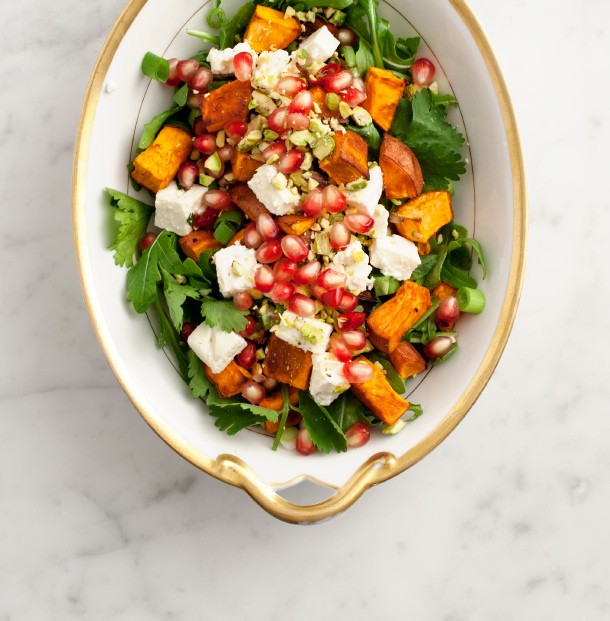
POMEGRANATE & KUMARA SALAD…

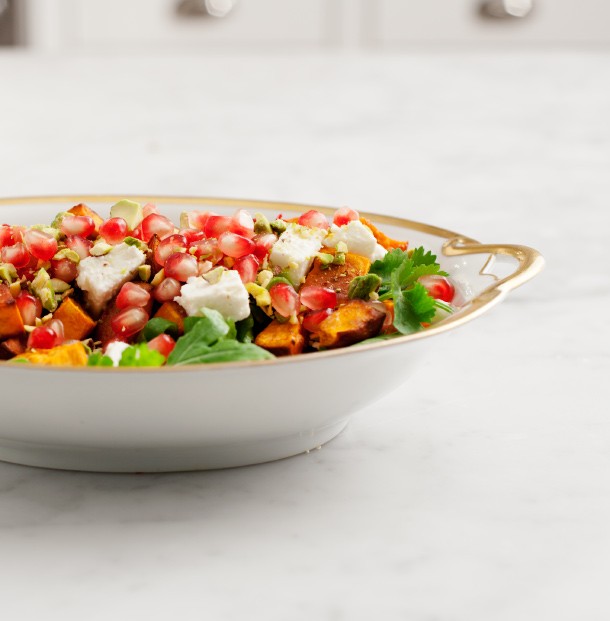
This is currently my favourite salad.  Not only is it delicious but visually, SOOO PRETTY!!  I discovered this on one of my favourite foodie blogs by Jeanine Donofrio called Love & Lemons and I have been making it for every occasion ever since.

Perfect for summer – this salad is ALWAYS a hit and guaranteed there will ALWAYS be someone asking after the recipe.
It’s festive, fun and simply divine! 

In essence, it’s roasted kumara tossed with tangy feta, sweet pomegranate seeds & toasted pistachios. This is so incredibly simple to throw together – even I can do it!

Salad components:

  • 2 medium kumaras, cubed, plus olive oil, salt & pepper for roasting
  • 2 cups baby salad greens (baby kale, spinach, arugula, etc.)
  • 1/3 cup pomegranate seeds
  • 1/3 cup crumbled feta
  • 1/4 cup toasted pistachios, toasted & chopped
  • handful of chopped cilantro
  • 2-3 chopped scallions, white and green parts

Dressing:

  • 2 tablespoons olive oil
  • 1/2 clove minced garlic
  • 2 teaspoons honey
  • 1 teaspoon sherry vinegar or white wine vinegar
  • salt & pepper, to taste

 Instructions:

  1. Roast the kumara: Preheat your oven to 200 degrees Celsius. Chop the kumara into bite sized cubes. Drizzle with some olive oil, salt and pepper, and roast in the oven for 20-30 minutes, or until the edges start to turn a darker brown. Once cooked, set aside to cool.
  2. Make the dressing: Whisk together olive oil, vinegar, honey, garlic, salt & pepper. Taste & adjust. Set aside.
  3. Assemble all salad ingredients, toss lightly in the dressing.

And you’re done!  If you’re not a fan of kumara just swap it out for ingredients you do like, such as potato or roast pumpkin.
Ange x
A Girl Interrupted By Fashion, Beauty & Anything Pretty That Catches My Eye
Want to be kept up to date on all the latest and greatest? Follow my blog by entering your email address on my homepage under “Stay Tuned, Follow My Blog”. xx

Have A Sparkling New Year With This Cute New Year’s Eve Idea…

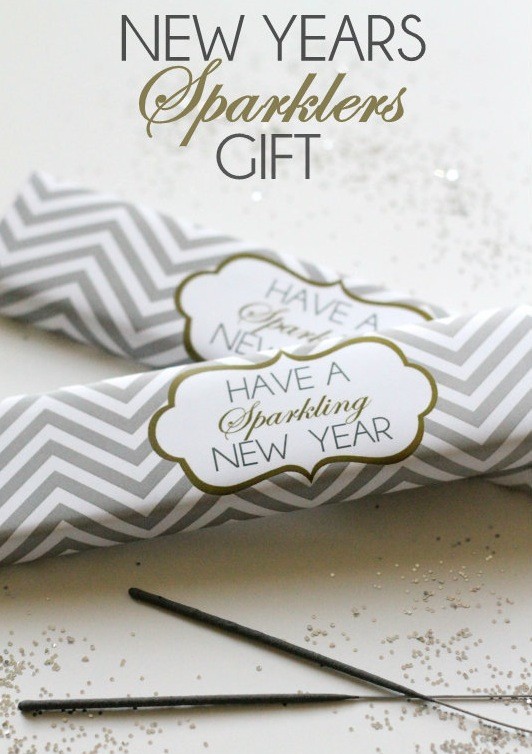
A gorgeous idea for New Year’s Eve (and comes with a free printable download).

If you’ve saved some sparklers from Guy Fawkes as I have, with the intention of using them on New Years, this is a super cute idea that I came across on Lilluna.com.

If you are hosting a party on New Year’s Eve, or heading along to someone else’s bash you can take these along to hand out to guests, that is, if you have enough to go around.  Alternatively just placing a box or 2 on the table as part of the table setting is just as effective.

If you still have your sparklers in their original box – fantastic – just click here lilluna.com for a printable gift wrapper (as shown above), cut to size, wrap around the box and seal with tape underneath – quick & easy!  If you don’t have enough boxes you could tie say 2 or 3 sparklers together with twine and print tiny versions of the above picture, hole-punch the corner and attach it as a gift tag.

Happy New Years!!

Ange x
A Girl Interrupted By Fashion, Beauty & Anything Pretty That Catches My Eye
Want to be kept up to date on all the latest and greatest? Follow my blog by entering your email address on my homepage under “Stay Tuned, Follow My Blog”. xx

Nail Art – How To Paint Nail Designs Perfectly On Both Hands!! (you don’t need to be ambidextrous)…

ImageSource: ChelleOnPinterest

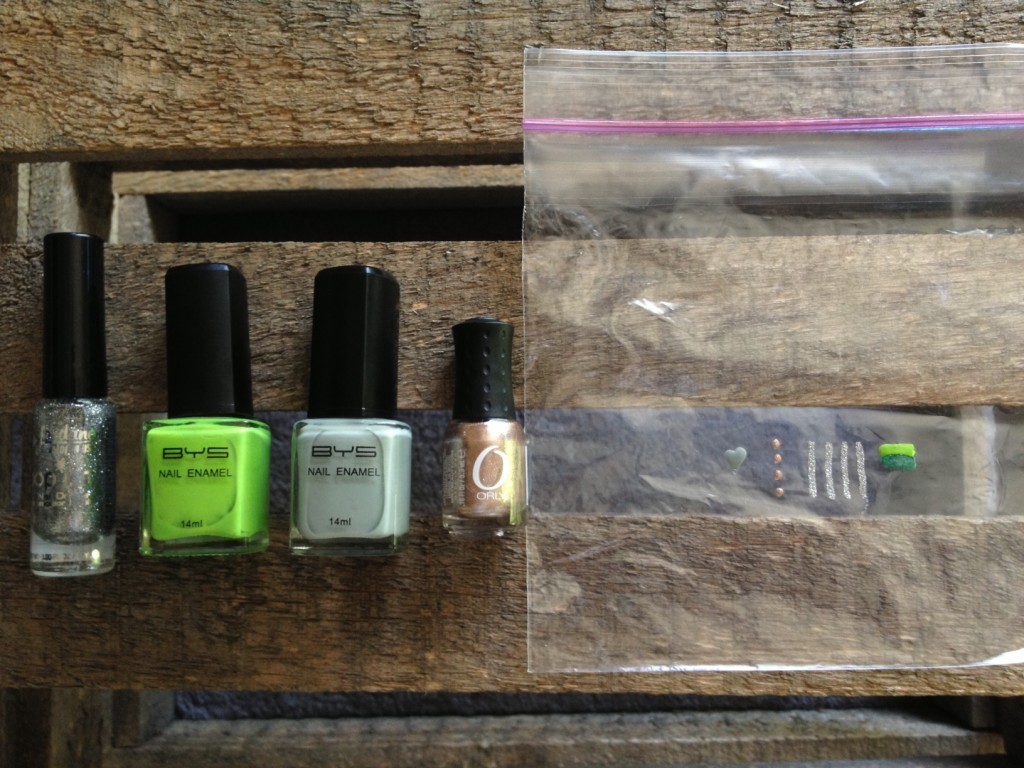
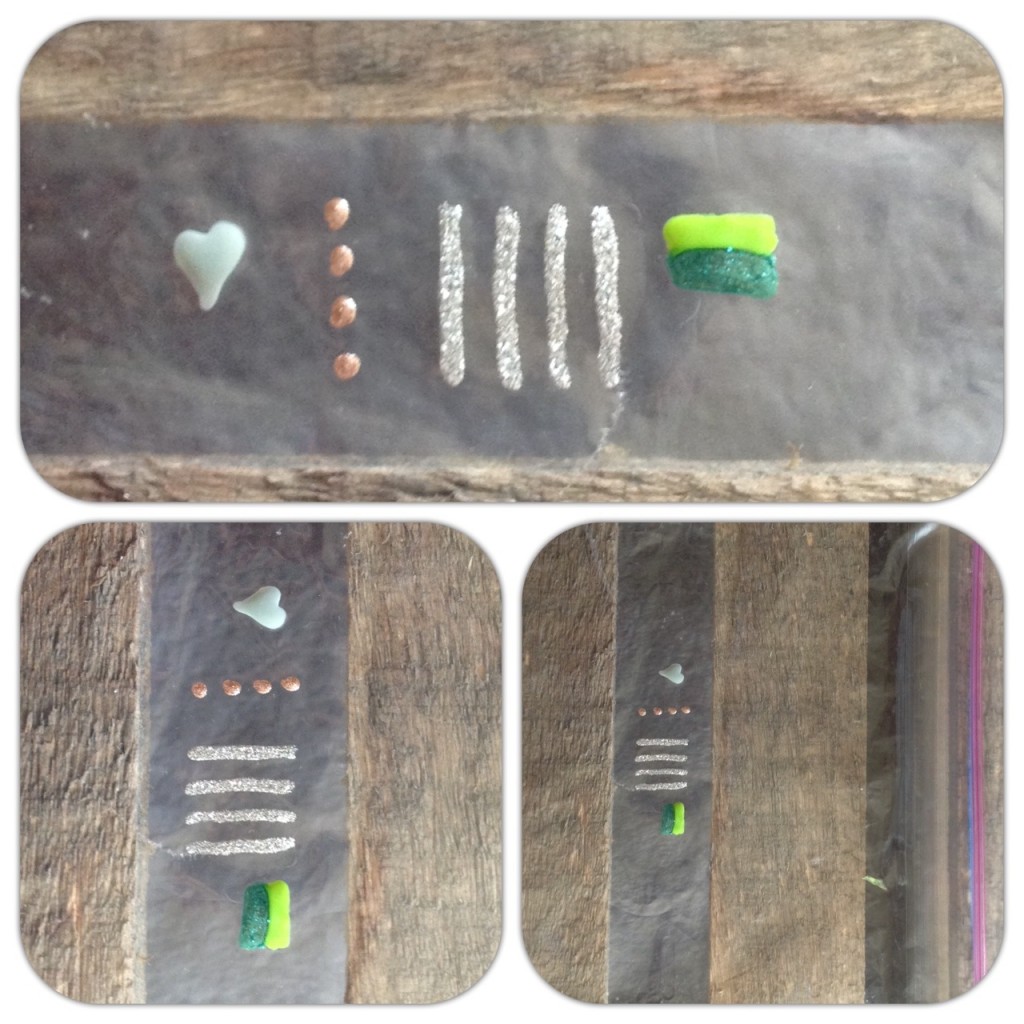
Ever wanted to paint pretty designs on your nails but found that it was impossible to DIY because you have one dominant hand that’s brilliant at drawing designs and the other hand that’s, well, not so much? Here’s a solution!  Prepare your designs before applying to your nails….

You will need:
Nail Polish
Ziploc BAg – like a sandwich bag or something similar (not cling wrap as it’s just too flimsy)
Clear Top Coat
A Hairdryer (if you’re impatient)
A Nail File

– First, paint your designs onto a Ziploc bag (as I’ve done in the below pics).  You will need to do fairly thick
coats and probably around 2 coats in total.
– Allow each coat to fully dry before applying the next coat (this is where you may want to use a hair dryer set
at ‘cool’)
– Apply a base coat to your nails
– Peel your designs off the Ziploc bag and place them on your nails
– Finish with a topcoat and viola – you’re done!

If you find that the design is hanging slightly over the end of your nail, use a nail file to gently file away any stray ends.  Then apply your top coat.

Happy DIY!

Want to be kept up to date on all the latest and greatest? Follow my blog by entering your email address on my homepage under “Stay Tuned, Follow My Blog”. xx

Ange x
A Girl Interrupted By Fashion, Beauty & Anything Pretty That Catches My Eye
How To Shuck A Strawberry Like A Boss….

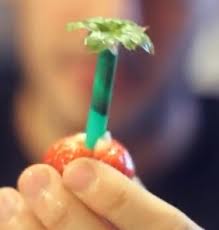
I think this is just genius!! I know what you’re probably thinking, ‘how hard can it be to pull the tops of strawberries?’ But this leaves the strawberry immaculately presented, which is fab for dinner parties, timely for Summer/Christmas gatherings, or when you’re popping a strawberry into a drink (mmmm champagne & strawberries) – they look so perfect!! Check out this super quick & easy ‘how to’ clip from young&reckless.com.

http://www.youngandreckless.com/blog/how-foodbeasts-shuck-a-strawberry/

I guess that’s why they call them ‘STRAW’berries huh! (I apologise for that – couldn’t resist!)

If you enjoyed this post – or are just enjoying my blog in general – enter your email address under “FOLLOW BLOG, STAY TUNED’ (situated on the right hand side of this article OR on my homepage), to ensure you get notified every time I upload a new article.

Ange x
A Girl Interrupted By Fashion, Beauty & Anything Pretty That Catches My Eye
L’Oréal Paris Elvive Extraordinary Oil – Product Review

Not long ago I was sent the then new, L’Oréal Paris Elvive Extraordinary Oil (EEO) to review and give my unbiased feedback, which after trialling the product for 4 weeks, I did.  The very generous folk at L’Oreal and The Soup also sent enough product to enable me to give a couple of bottles  to friends and work colleagues; and given their thoughts and feedback matched mine, I knew I was onto a winner, thus deemed it worthy of sharing with you lovelies.

Since concluding my review of Elvive Extraordinary Oil I have continued to use this golden hued elixir, as it’s a product that I am genuinely loving!  The market is currently flooded with hair oils (Moroccan Oil, Aragon Oil, the list goes on) and being the perfect consumer that I am, I’ve pretty much tried them all.  The problem with hair oils that I’ve tried in the past is that they are just too heavy for my hair; and as my hairdresser Kurt aka The Best Hairdresser in the World can confirm, I do not need any more weight added to my hair!.  The texture of L’Oreal’s Extraordinary Oil is like that of any liquid hair serum, yet lightweight, easy to rub between your hands before distributing evenly through damp or dry hair and is absorbed quickly without leaving a greasy residue.  I have also been applying it to the ends of my hair during the day (yup, at work, whilst at my desk) and I love that my hair looked super healthy right down to the very tips.  It has a handy pump dispenser (that locks on turning) and comes in a beautiful glass bottle (I’m a sucker for packaging!).


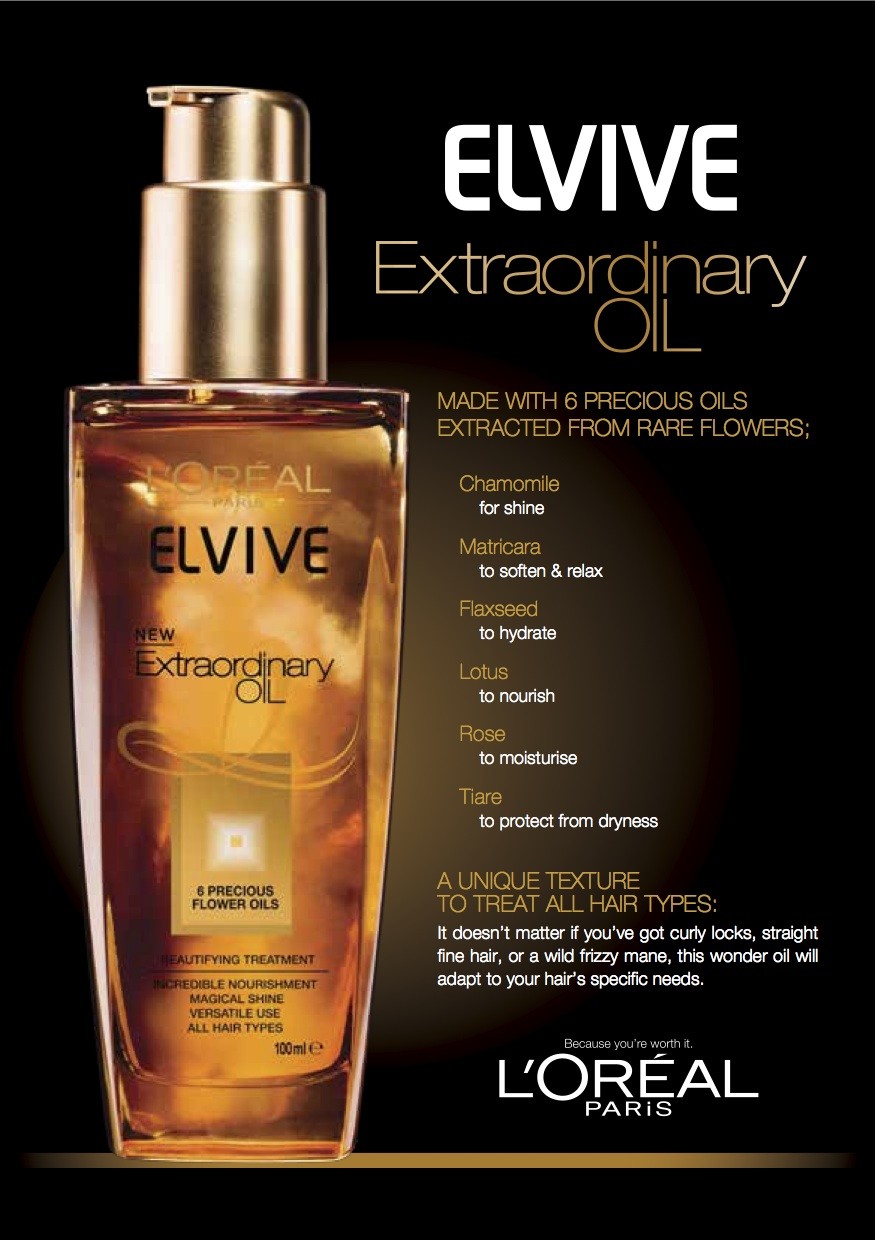
With a unique alchemy of 6 precious flower oils, it claims to nourish from root to tip and for me, it absolutely delivered!   Use before shampooing, as a mask, before straightening or as a finishing touch.  Lotus oil gives an intense nutrition, Camomile Oil boosts shine and radiance, Tiare flower oil protects from dryness, Matricaria Oilsoftens and relaxes hair texture and Flax Oil intensely hydrates.

The glossy sheen that it’s given my hair is amazing!  If you’re considering trying one of the many hair oils currently in the market, the L’Oreal Elvive Extraordinary Oil is definitely my recommendation.  RRP $19.99.
Ange x
A Girl Interrupted by Fashion, Beauty and Anything Pretty That Catches My Eye