Tag

tutorial Archives - Gurlinterrupted

If You’re A Makeup Artist Or Beauty Junkie You’ll Love This!

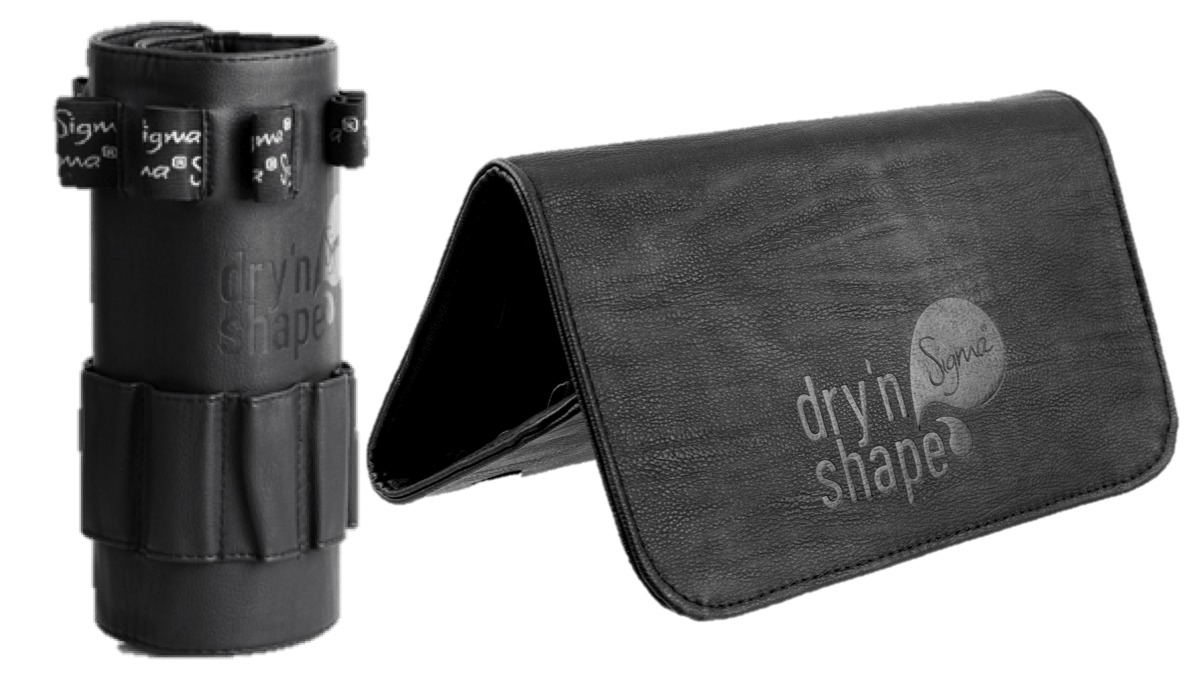
Sigma Dry n shape

Sigma have recently released a new product that has literally changed my life!  I’m not exaggerating – THIS IS AMAZING!!  If you’re a makeup artist (like moi) you’ll know just how damned important it is to regularly wash your brushes, and you’ll totally understand how time-consuming (and slightly frustrating) it is to not only properly wash them, but also ensure they dry in such a way that your brushes keep their shape perfectly.

Enter the new Sigma DRY’N SHAPE.  Holy crap, this is genius!  Not only does the DRY’N SHAPE maintain your makeup brushes original form, it dries them a lot faster too.

Sigma dry'n shape

The Sigma Beauty Dry’n Shape was specially designed to completely dry and shape your most dense brushes within 4 to 6 hours, guaranteed. The Dry’n Shape provides the necessary pressure to bristles to re-shape them while quickly and efficiently removing water from every bristle. It is an easy, quick, and effective way to quickly dry and shape your makeup brushes.  The storage facility is pretty darn cool too – no more laying your brushes out across a towel, or several paper towels, as the case may be.

Check out this super quick video to see exactly how it works – if you’re anything like me, you’ll be sold before the video ends!

SHOP IT HERE (enter my SIGMA DISCOUNT CODE MAR2014 to get 10% off when you checkout): www.sigmabeauty.com/Dry_n_Shape

Ange xx
Gurlinterrupted

A Girl Interrupted By Fashion, Beauty & Anything Pretty That Catches My Eye

Gurlinterrupted Facebook, beauty blog nz, fashion blog nz, style blog nz, heels, shoes, clothes,

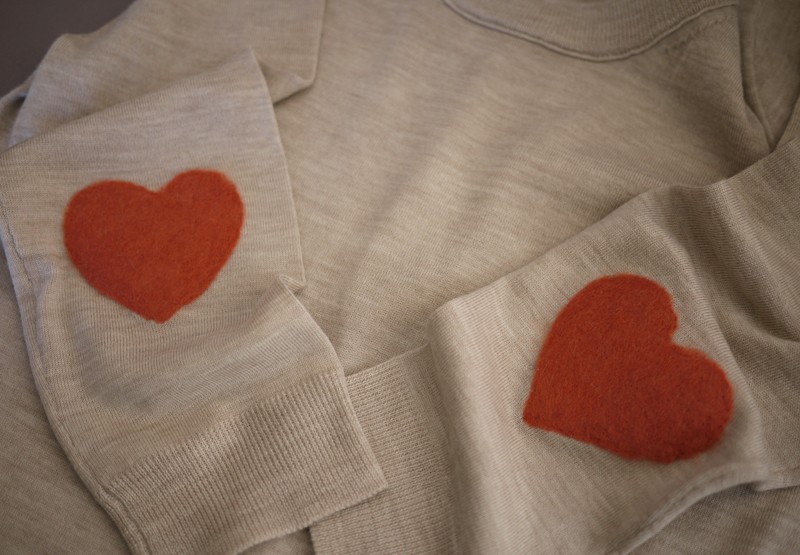
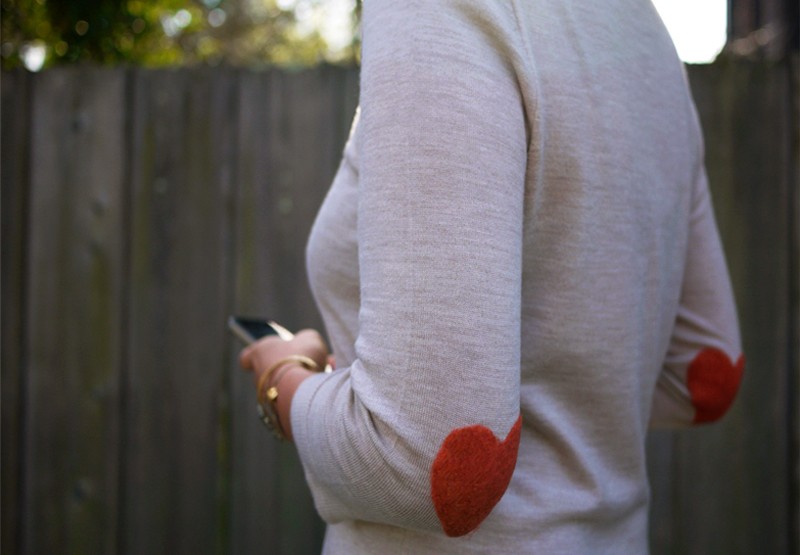
FASHION DIY: Needle Felting Heart Elbow Patches

fashion, DIY, Elbow Patches, Needle Felting, How To, Tutorial, fashion blog nz, style blog nz, beauty blog nz, New Zealand PR, beauty media, fashion media, angie fredatovich, sweater, heels, clothes

I stumbled (literally – I love ‘Stumbleupon.com’) across this Heart Elbow Patch DIY tutorial by Erica of ‘honestlyWTF’ a couple of years ago and I’m determined to do this with one of my jumpers before winter comes to an end. I mean hey – all it entails is repeatedly stabbing a needle up and down into a piece of fabric, heck yes I can do that. Here’s Erica’s ‘how to’ and exactly; what I plan to do myself this weekend!

fashion, DIY, Elbow Patches, Needle Felting, How To, Tutorial, fashion blog nz, style blog nz, beauty blog nz, New Zealand PR, beauty media, fashion media, angie fredatovich, sweater, heels, clothes

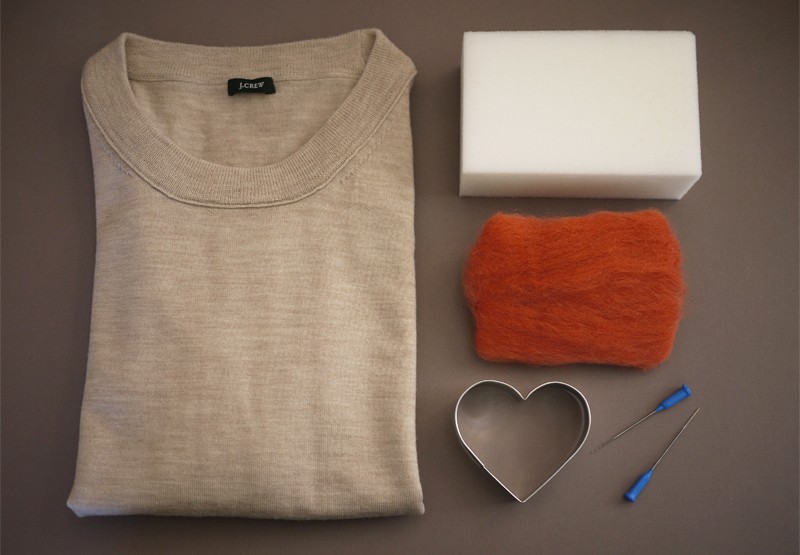
Here’s what you’ll need (most of which you can get from Spotlight or The Warehouse)

  • wool sweater
  • 36 gage felting needle
  • piece of dense foam cut to size (or a needle mat)
  • some wool roving
  • a 3” (or thereabouts) cookie cutter
  • an iron

fashion, DIY, Elbow Patches, Needle Felting, How To, Tutorial, fashion blog nz, style blog nz, beauty blog nz, New Zealand PR, beauty media, fashion media, angie fredatovich, sweater, heels, clothes

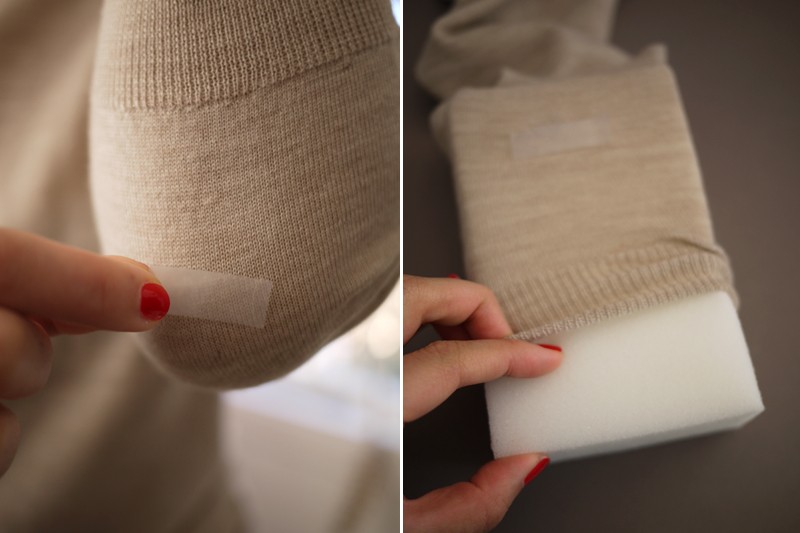
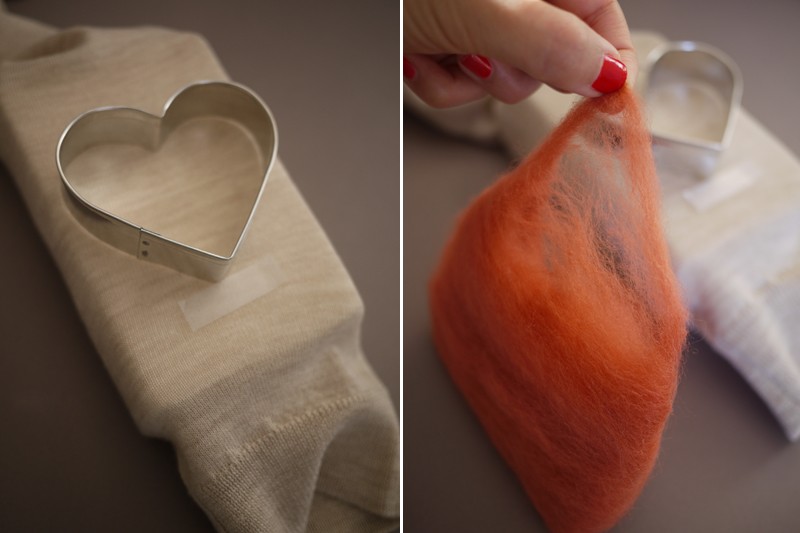
With the sweater on, place a piece of tape about half an inch below the elbow. Do the same with the opposite elbow. Remove the sweater and insert the foam block into one of the sleeves.

fashion, DIY, Elbow Patches, Needle Felting, How To, Tutorial, fashion blog nz, style blog nz, beauty blog nz, New Zealand PR, beauty media, fashion media, angie fredatovich, sweater, heels, clothes

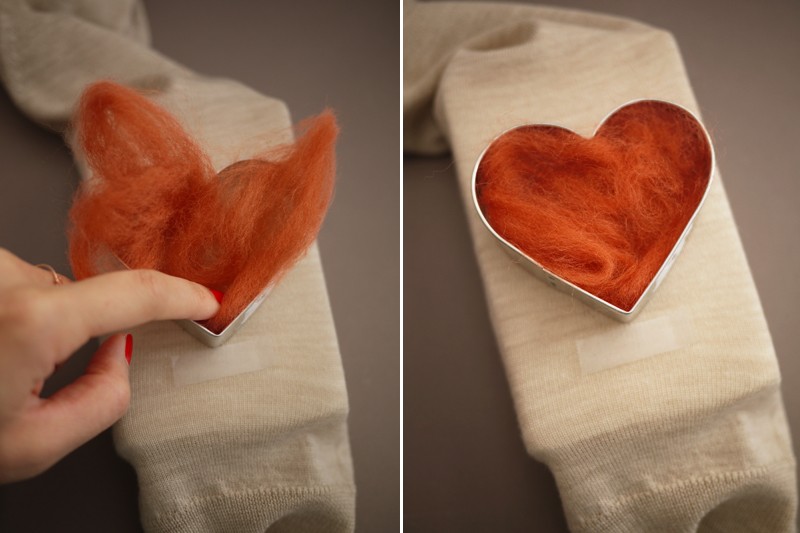
Align and centre the bottom of the cookie cutter along the top of the tape. Pinch off a few tufts of wool roving.

fashion, DIY, Elbow Patches, Needle Felting, How To, Tutorial, fashion blog nz, style blog nz, beauty blog nz, New Zealand PR, beauty media, fashion media, angie fredatovich, sweater, heels, clothes

Fill the cutter, spreading out the wool fibres evenly.

fashion, DIY, Elbow Patches, Needle Felting, How To, Tutorial, fashion blog nz, style blog nz, beauty blog nz, New Zealand PR, beauty media, fashion media, angie fredatovich, sweater, heels, clothes

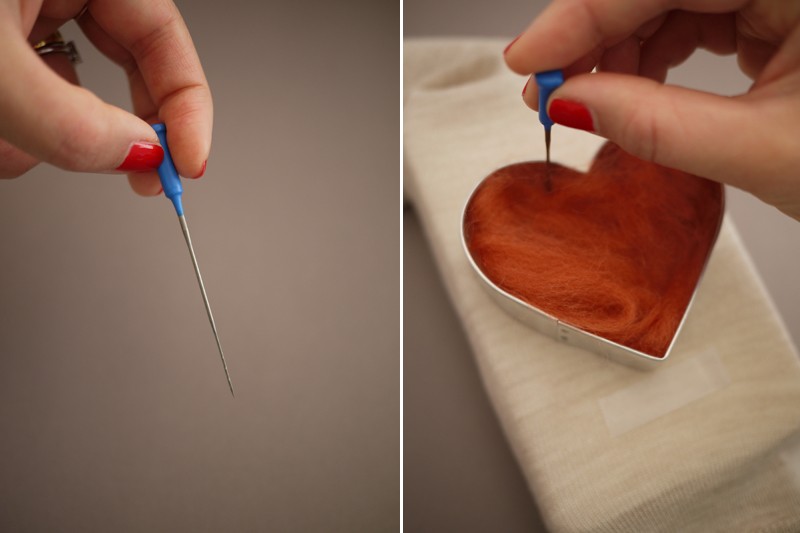
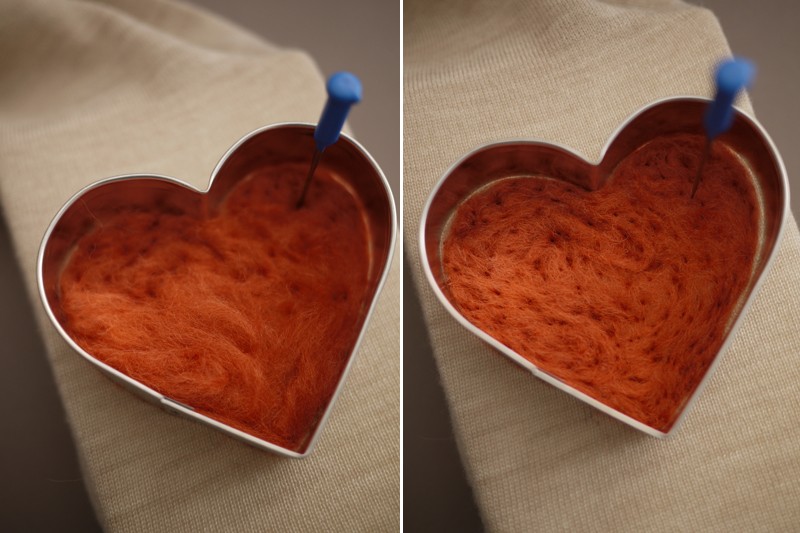
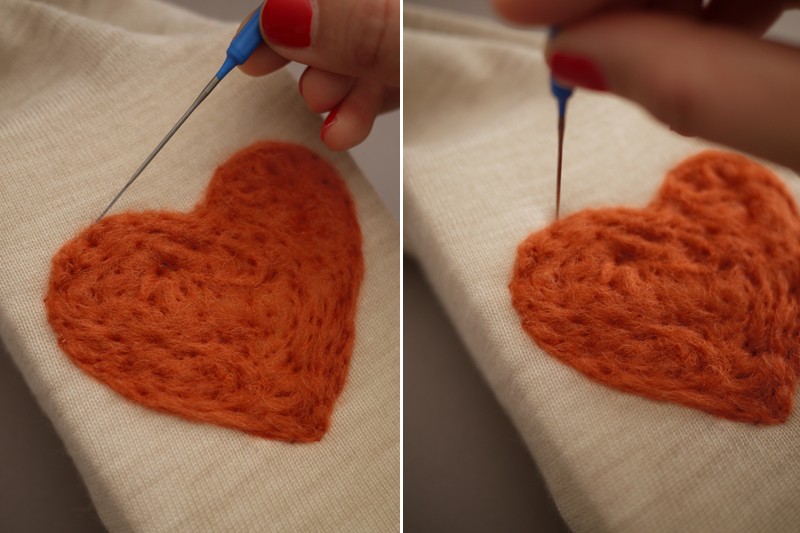
At the base of all felting needles are tiny, sharp burrs, which grab and interlock the wool fibres. While holding the needle vertically, repeatedly stab it into the wool roving and through the sweater. I found it easier to work around the outer perimeter of the cutter first and then work my way inwards. Important tip: To prevent breaking the needle, always keep the needle upright and never at an angle. And don’t forget to pay careful attention to your fingers while felting as the needle is extremely sharp!

fashion, DIY, Elbow Patches, Needle Felting, How To, Tutorial, fashion blog nz, style blog nz, beauty blog nz, New Zealand PR, beauty media, fashion media, angie fredatovich, sweater, heels, clothes

Continue stabbing away until the surface is flat and even. Fun, right?

fashion, DIY, Elbow Patches, Needle Felting, How To, Tutorial, fashion blog nz, style blog nz, beauty blog nz, New Zealand PR, beauty media, fashion media, angie fredatovich, sweater, heels, clothes

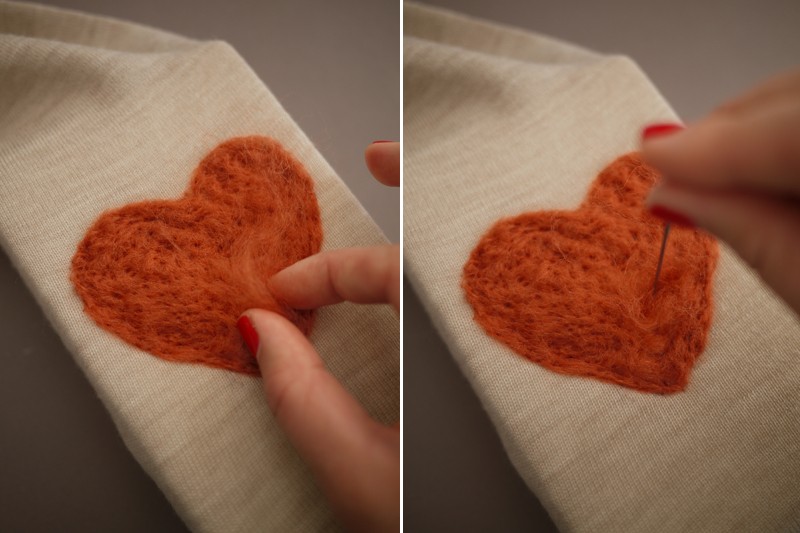
Remove the cutter and use the tip of the needle to reign in any stray fibres, if necessary. Don’t worry about the holes as they will be mended later.

fashion, DIY, Elbow Patches, Needle Felting, How To, Tutorial, fashion blog nz, style blog nz, beauty blog nz, New Zealand PR, beauty media, fashion media, angie fredatovich, sweater, heels, clothes

Patch up any bare or uneven spots by adding more wool roving where needed.

fashion, DIY, Elbow Patches, Needle Felting, How To, Tutorial, fashion blog nz, style blog nz, beauty blog nz, New Zealand PR, beauty media, fashion media, angie fredatovich, sweater, heels, clothes

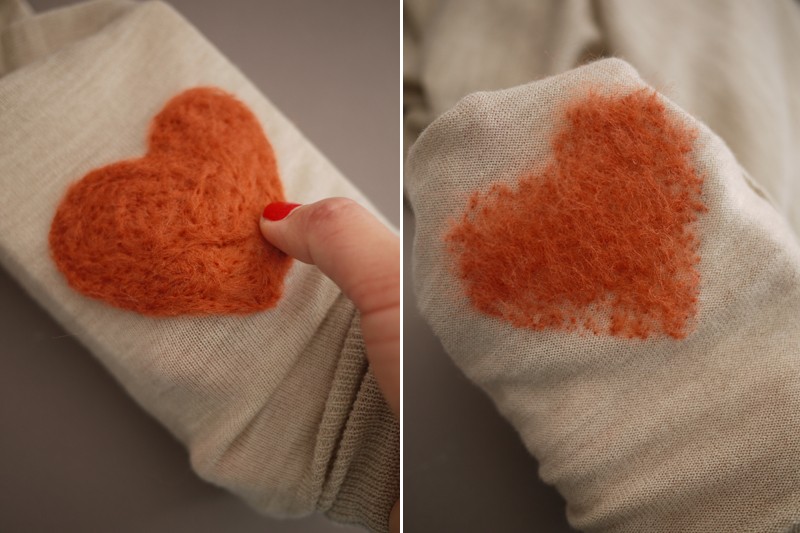
Carefully peel the sweater away from the foam. Notice that the fibres have transferred through to the backside of the sweater.

fashion, DIY, Elbow Patches, Needle Felting, How To, Tutorial, fashion blog nz, style blog nz, beauty blog nz, New Zealand PR, beauty media, fashion media, angie fredatovich, sweater, heels, clothes

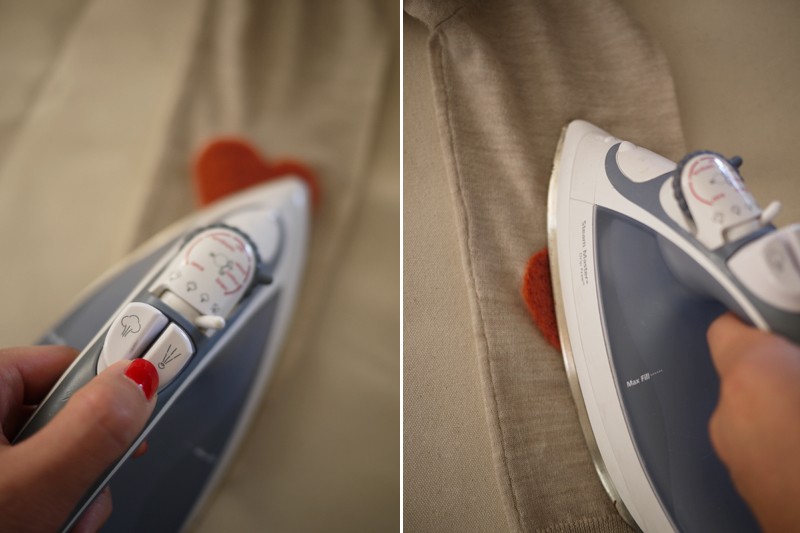
To smooth and set the patch, spritz with water and press with an iron on the wool setting.

fashion, DIY, Elbow Patches, Needle Felting, How To, Tutorial, fashion blog nz, style blog nz, beauty blog nz, New Zealand PR, beauty media, fashion media, angie fredatovich, sweater, heels, clothes

Repeat the same steps the other sleeve.

fashion, DIY, Elbow Patches, Needle Felting, How To, Tutorial, fashion blog nz, style blog nz, beauty blog nz, New Zealand PR, beauty media, fashion media, angie fredatovich, sweater, heels, clothes

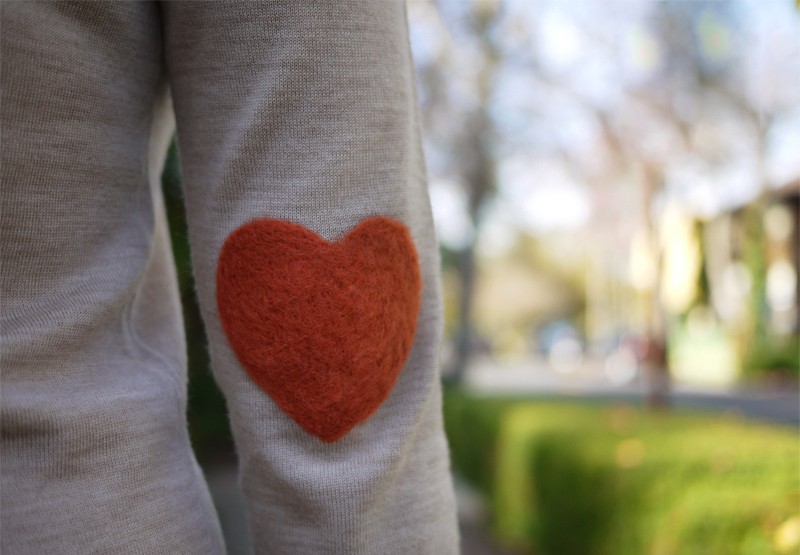
Viola! Your heart-shaped elbow patches are finished!

fashion, DIY, Elbow Patches, Needle Felting, How To, Tutorial, fashion blog nz, style blog nz, beauty blog nz, New Zealand PR, beauty media, fashion media, angie fredatovich, sweater, heels, clothes

Ange x
Gurlinterrupted
A Girl Interrupted By Fashion, Beauty & Anything Pretty That Catches My Eye

Gurlinterrupted Facebook, beauty blog nz, fashion blog nz, style blog nz, heels, shoes, clothes,

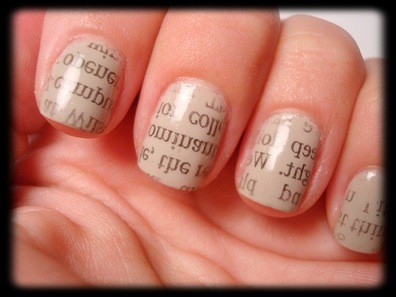
Newspaper Nails…

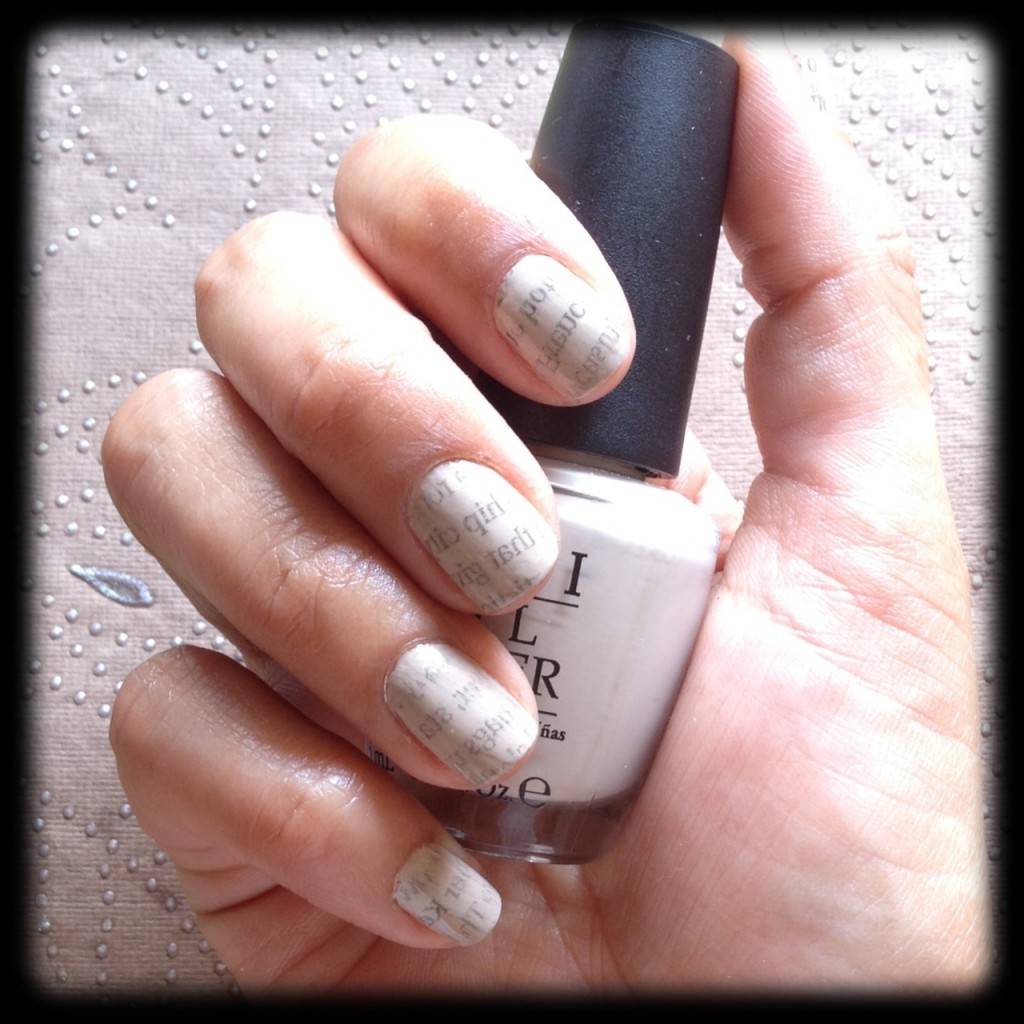
Newspaper nails are so easy to do. This is a great tutorial for someone wanting fun nail art without too much hassle!  I’ve seen ‘newspaper nails’ around for a while now but hadn’t tried it myself until last night and I was pleasantly surprised with how quick and easy it was.  My ‘Step by Step’ tutorial will show you how to achieve this super cute look…

Here’s what you will need:

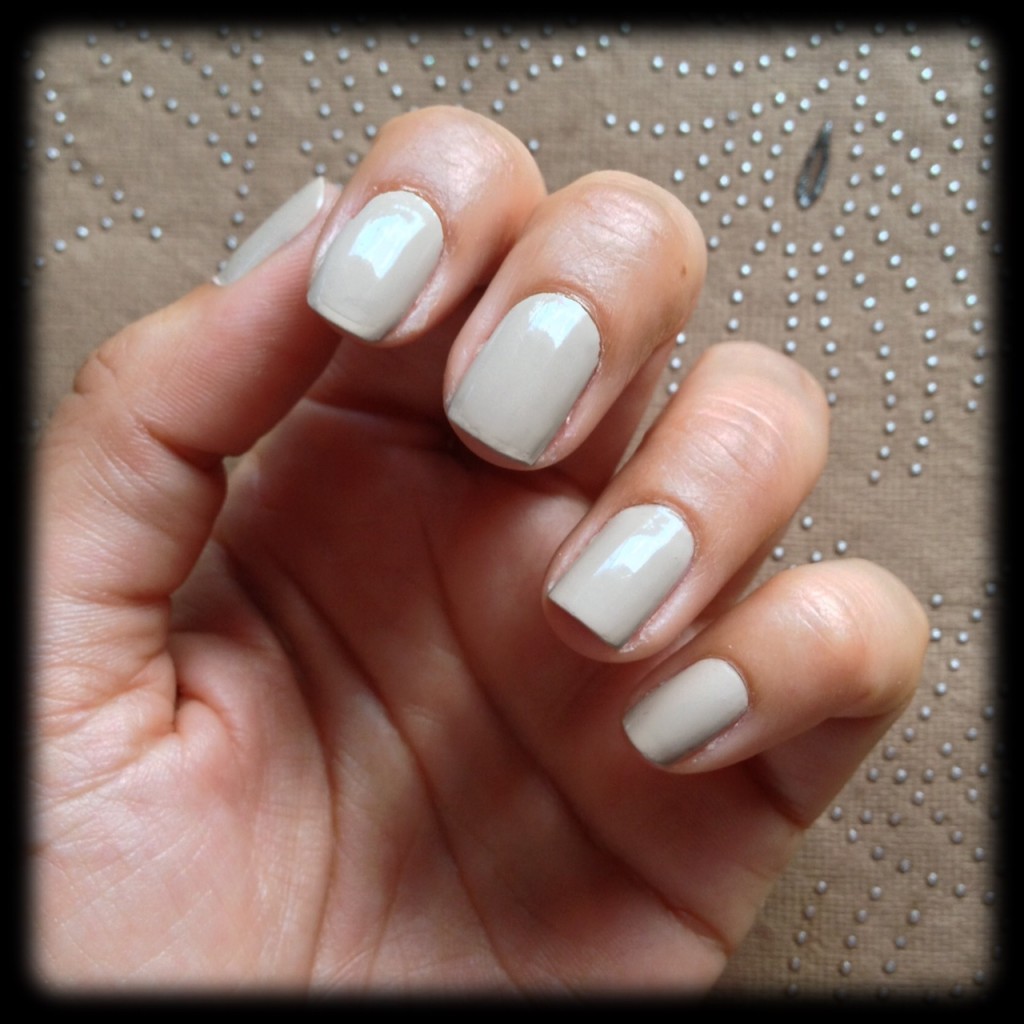
  • Light Coloured Nail Polish for the base (I’ve used OPI ‘s Did You Ear About Van Gogh?)
  • Alcohol (I recommend Vodka – not to drink!!) as it needs to be a white spirit. If you happen to have Rubbing Alcohol this is just as good
  • Newspaper
  • A small bowl (I recommend a deep lid/cap from a container)
  • Cotton pads
  • Cotton Buds/Cue tips
  • A Topcoat

STEPS:

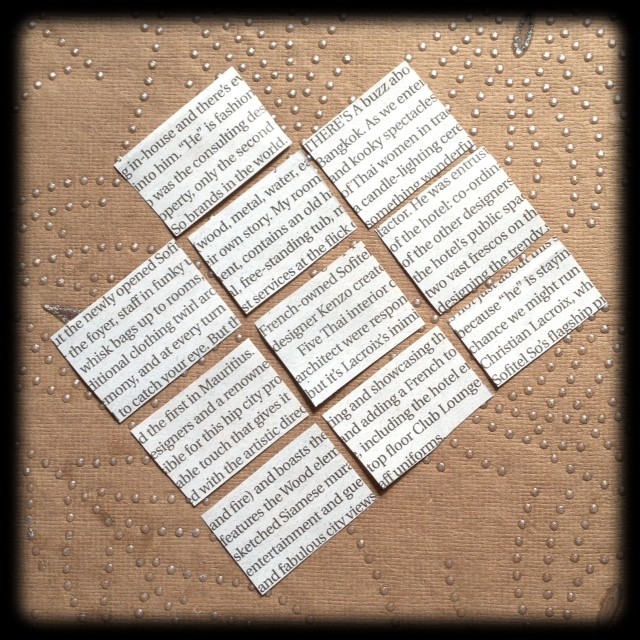
1. Cut up a sheet of Newspaper into 10 pieces (slightly larger than your nails).

2. Paint your nails in a light grey or nude nail polish colour. Let it dry thoroughly before doing the next step.

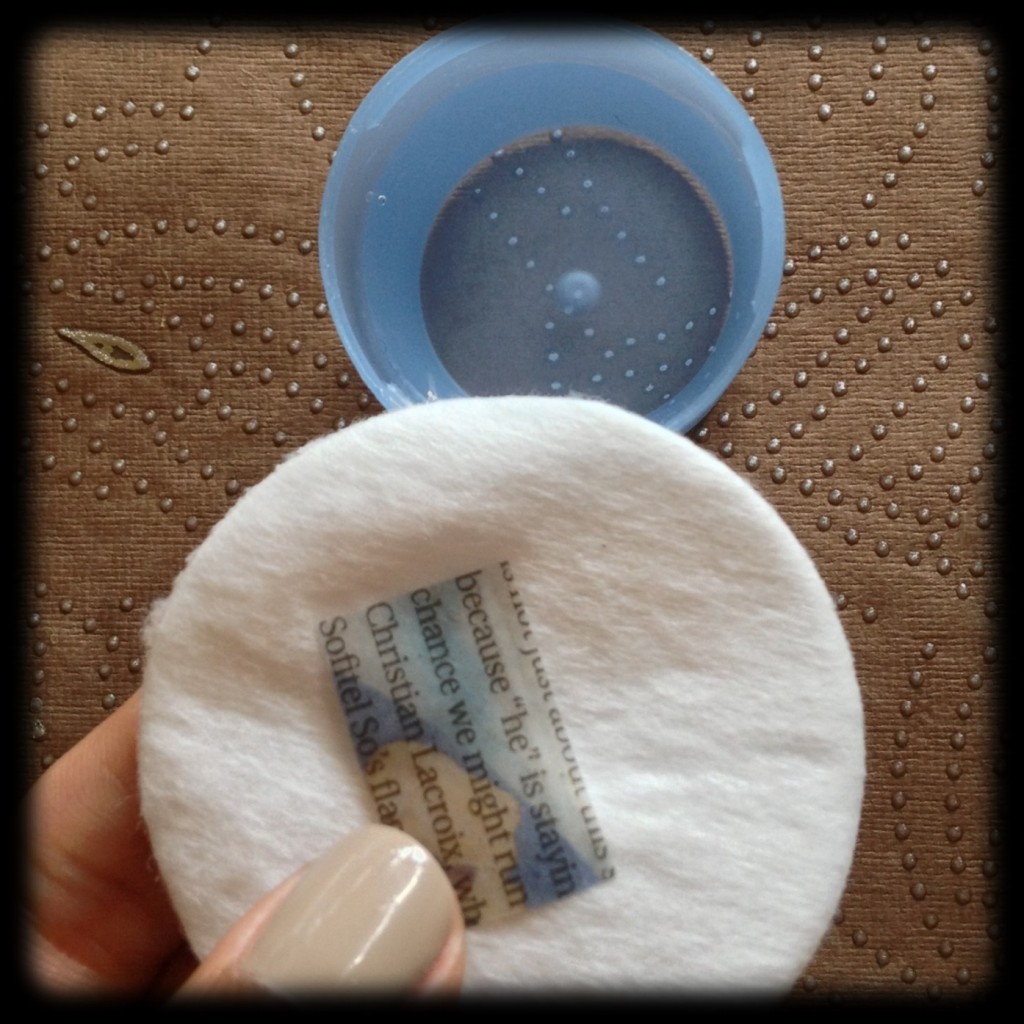
3. Pour some alcohol into the cap or small container.

4. Dip a piece of newspaper into the alcohol for around 5 seconds and place, print side up, onto a cotton pad.

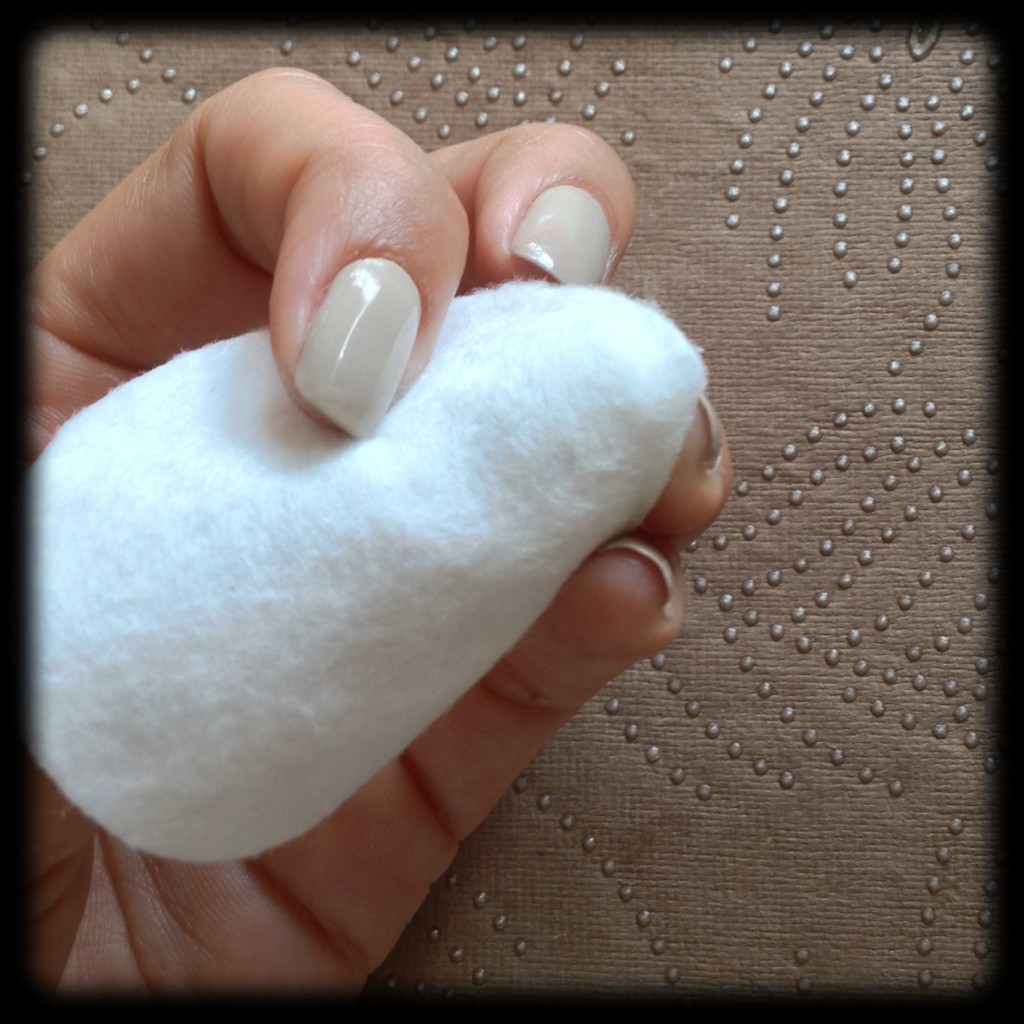
5. Press nail firmly onto the newspaper print and hold in place using the cotton pad for around 10-15 seconds (the cotton pad allows you to press firmly without smudging).

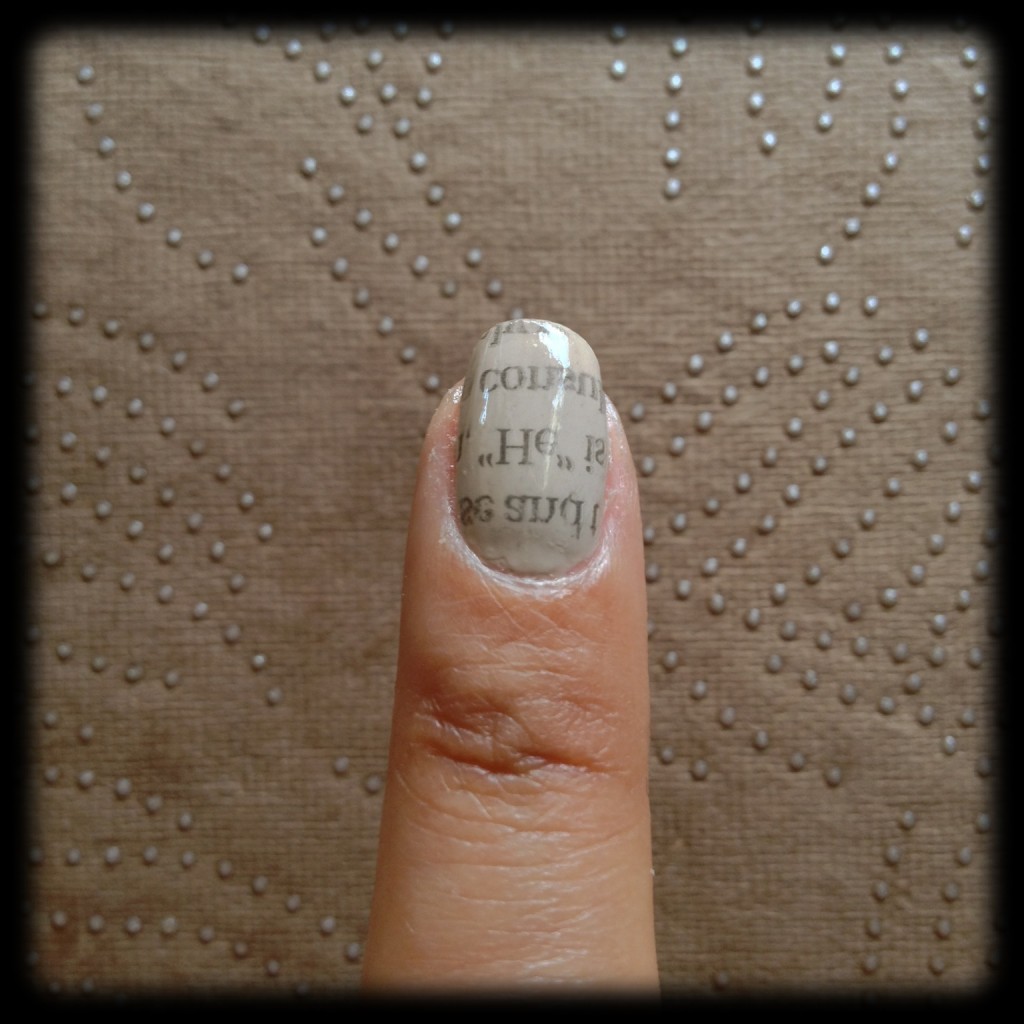
6. Lift your nail off the cotton pad/newspaper carefully. You’ll find that the ink from the newspaper will be left behind

7. Continue steps 4, 5 & 6 until you’ve competed each of your nails

8. Apply a topcoat to your nails. This will ensure the print wont smudge and gives your nails some extra shine.

If you have any print left around your nails, simply get a cotton bud and some nail polish remover to clean up your nails.

You can do this nail art with any newspaper print (unfortunately magazines won’t work as the paper is too glossy). A crossword cut into pieces would look kinda amazing too !

Don’t forget to ‘Like’ Gurlinterrupted on FACEBOOK and follow my blog by entering your email address on the homepage here on my site, under “Stay Tuned, Follow My Blog”. xx

Ange x
A Girl Interrupted By Fashion, Beauty & Anything Pretty That Catches My Eye

Latest in Beauty: Urban Decay & Benefit Cosmetics


I’m a little excited with my latest beauty product haul, in particular, Urban Decay and Benefit.  If I’m being completely honest, ‘a little excited’ is probably down playing it just a tad, so I thought I would share my wee haul with you lovelies, because these items are worth blogging about and I have no qualms in recommending them.  They are tried and true, ok not the Smoked Palette because that’s new, but the liners are my staples and if you can get your hands on them, do it – you will LOVE them.

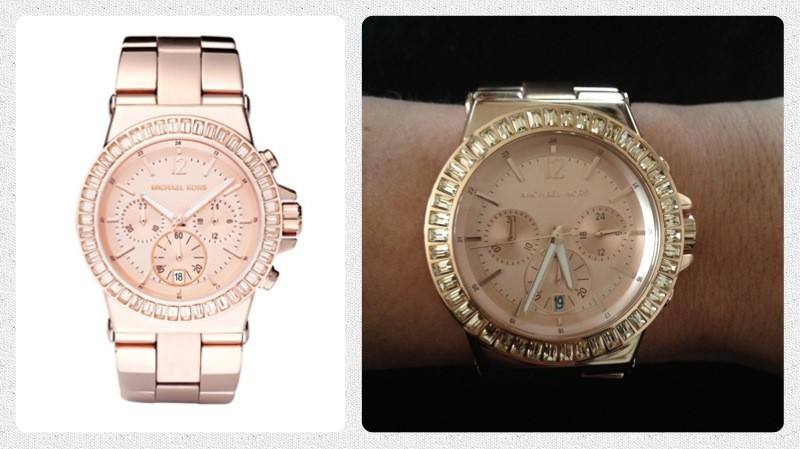
My good friend Nat finally arrived back in NZ after jet setting around the world for the last few months and whilst jet setting, managed to tick off all the items on my shopping list (see, I told you she’s a good friend!!).  At the top of my list, other than my Michael Kors Rose Gold Watch, of which I worship (see pic below) are my Urban Decay goodies.

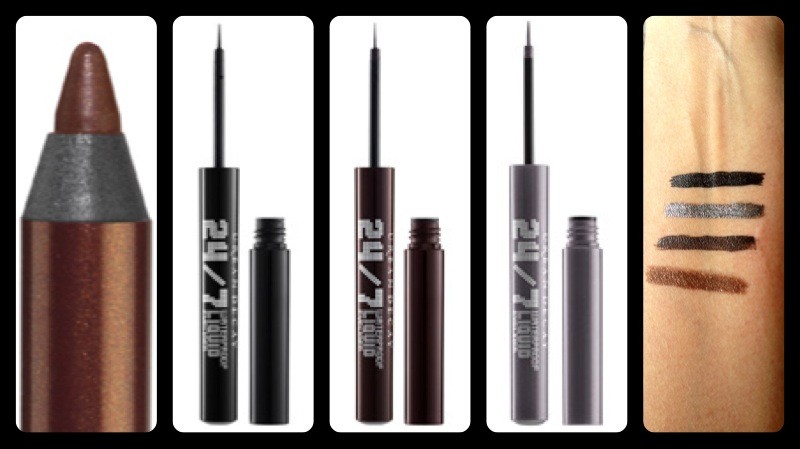
The first Urban Decay liner is the 24/7 Glide-On Waterproof Eye Pencil in Bourbon.  This brown liner is creamy and smooth and applies like a dream!  There’s a slight shimmer to it and it completes the perfect smokey eye look.  The next three liners are the Urban Decay 24/7 Waterproof Liquid Eyeliners.  Colours: Perversion (black), Demolition (brown) and Revolver (a metallic gun-metal grey).  These liners, once applied, don’t budge or smudge, nor do they peel off (like some liquid liners tend to – ugh!).  It’s like applying a liquid metal to your eye and the quality is second to none.  You know my love of MAC Cosmetics – well, they surpass MAC liners in every way, shape and form.
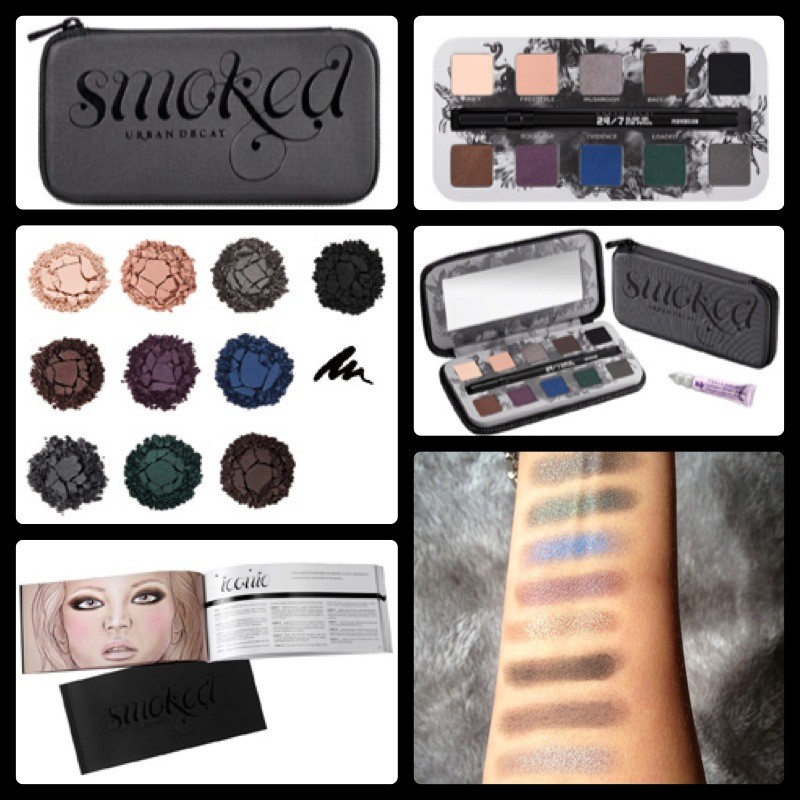
My other eye-candy goodness is the Urban Decay SMOKED Palette.  Urban Decay produce amazing palettes (we all know the iconic Urban Decay NAKED Palette, of which sold out world-wide, twice!!) and the SMOKED Palette is no exception.  Zipped inside this sleek, mirrored case are ten decadent shades (five are exclusive), including neutral matte’s and shimmering jewel tones for a range of smoky looks. Sure, you can create a smoky eye with a range of gray and black shades. But what about a touch of green, blue or bronze? The Smoked Eyeshadow Palette lets you keep things simple… or get a little more creative.  Also included is a beautifully illustrated, step-by-step guide to 12 smoky eye looks, written by Urban Decay founder Wende Zomnir. Both smoky-eye pros and shadow newbies will benefit from this detailed guide.  I am SO happy with this purchase!

Colours: Kinky, Freestyle, Mushroom (my fav!!), Backdoor, Blackout, Barlust, Rockstar, Evidence, Loaded, Asphalt.
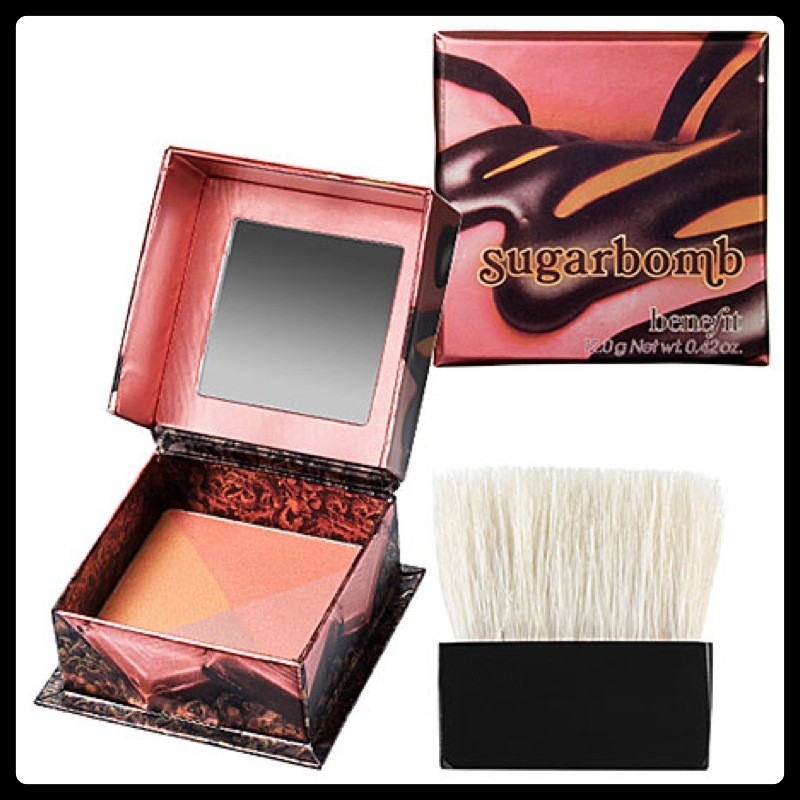
Last, but definitely not least – Sugarbomb by Benefit Cosmetics.  This  boxed blush is another of my repeat purchases.  A quad of shimmering colours that combined, are the perfect blush and/or cheekbone highlighter.

Beautiful, shimmery, ‘cheekbone popping’ goodness!  Benefit’s Sugarbomb looks great on all skin tones; and in summer – truly divine!
So that’s my little beauty haul, hope you enjoyed it 🙂    Now, although completely irrelevant to the beauty blog above, I leave you with an image of my new love, my arm candy, my Michael Kors Baguette-Bezel Rose Gold Watch *swoon*.
I’d love to hear of your beauty product ‘must-haves’ and/or recommendations, hey, what beauty junkie doesn’t want to hear about gems they’ve not discovered yet right?!  So leave a comment and I’ll be sure and check them out.

Ange x
A Girl Interrupted by Fashion, Beauty and Anything Pretty That Catches My Eye


Is Nude The New Black?
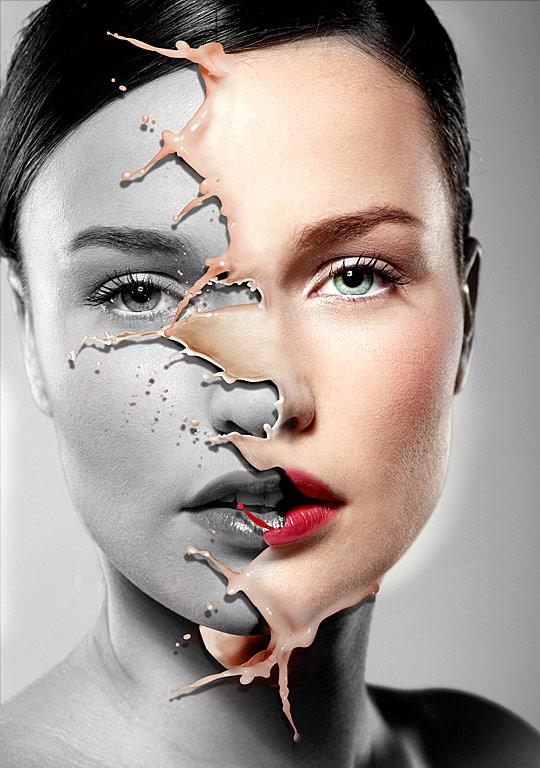
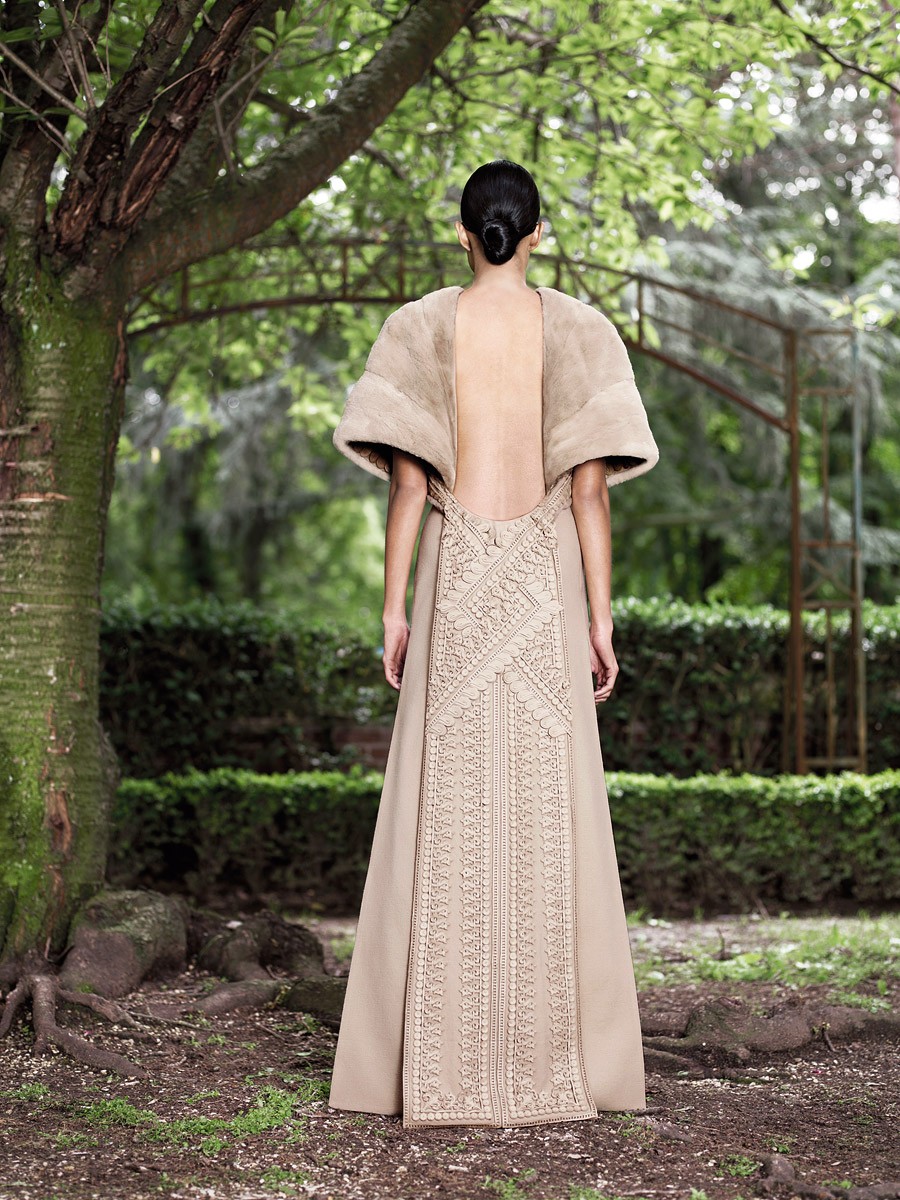
image source: fashionbombdaily.com

Whether it’s playing the starring role or simply complimenting an already perfect outfit, nude is fast becoming a key wardrobe staple.

There is no better time than right now for nude (or neutral/beige/buff, whichever reference to the skin coloured hue you prefer) to make it’s mark on the fashion scene.  With neon, paisley, metallics and florals taking centre stage on the runway, nude pieces have never been such a wardrobe necessity.  It’s the perfect shoe colour compliment with a bright or ‘busy’ outfit, yet works just as well being the main colour base of your outfit, as you can add beautiful bright pops of colour using on-trend accessories.   I’m a huge fan of teaming nudes with black; and with some of the more feminine floaty pieces – these look great teamed with something a little harder, like a leather jacket and/or a pair of black biker style ankle boots.  it’s near impossible to get it wrong with nudes, because it simply goes with EVERYTHING!

Dark tones of nude make a perfect match for those with a darker skin complexion, whilst light nudes and rosy tones get along just fine with fair-skinned complexions.  Just be careful to pick nudes that aren’t an exact match with your skin color – but that’s pretty much the only rule when it comes to this chic muted tone.

Here are some of my favourite looks encompassing the lastest runway trends, mixed with nudes……

Still not convinced?   Did I mention that wearing flesh-tone heels will always make your legs look longer?

Ange x
Fashion, Beauty, Lifestyle blogger

images sourced L2R: ca.shine.yahoo.com, asos.com, capecodcollegiate.tumblr, fashionworship.com, decoycouture.tumblr, fashionworship.com, shopbop.com, stylishlymine.tumblr

DIY: Make Your Own BB Cream/Tinted Moisturiser

A Simple Guide To Making Your Own BB Cream/Tinted Moisturiser

If you’re wanting a fresh flawless light coverage that evens out your skin tone and gives you a glowing, healthy complexion without having to have a ’full blown, face full of makeup’ . Then a BB Cream might be just what you’re  after.

BB Creams (otherwise known as blemish balms or beauty balms) have been around for years and more recently have risen to a cult-like status in the beauty industry. They are essentially tinted moisturisers that give you a healthy glow, cover blemishes and even out your skin tone (perfect for summer!!).

A DIY BB Cream is actually incredibly easy to make and saves you the cost of purchasing more makeup when you will more than likely already have the basic ingredients at home. You can make it in small amounts (so it doesn’t expire before using it all) and its ‘made to match’ your skin tone perfectly by using your own foundation.

Here is a simple step by step guide to making your own.

Ingredients:

  • Sunscreen
  • Moisturiser
  • Liquid Concealer
  • Cream Foundation

I also add the following, but this is totally optional:

  • Lustre Drops (or mineral foundation powder)
  • A Setting spray

How to:
The brands I use, as outlined below, are simply what I have at home, this will still work perfectly using whatever brands you have.

In a small container (an empty tester pot, dipping bowl or ramekin is quite good), mix the following:

  • 1 teaspoon of sunscreen (not necessary if your current foundation already contains sunscreen as mine does)
  • 1 teaspoon of Kiehl’s moisturiser
  • 1/4 teaspoon of MAC liquid concealer
  • 1/4 teaspoon of MAC Lustre Drops (optional – I use this for a dewy finish)
  • 1/2 teaspoon of MAC Matchmaster Cream Foundation
  • 1/2 teaspoon of MAC Fix+ Setting Spray (optional)

Mix thoroughly and store in a small container or travel bottle (you can get great travel size containers from PlasticBox for $1.99) and VOILA – your very own, ‘made to match your skin tone’ BB Cream.

BB Cream is my current ‘go to’  beauty product right now and I’m loving not having to wear a full coverage foundation to achieve a glowy, fresh, flawless look.

Ange x
Fashion/Beauty/Lifestyle Blogger

FINDATION


As I was browsing through www.nzgirl.co.nz the other day I came across a fantastic article aptly named FINDATION.  As soon as I read about a website that can match your current foundation to numerous brands, solely based on foundations that you already own and know are the right shade for your skin tone, I was hooked and had to find out more!

www.findation.com is GENIUS!!

I cannot count the number of times I have been frustrated by buying the wrong colour foundation.  Sure, in the tiny mirrors and bad lighting of a store, its easy to be fooled into thinking you have the right shade of foundation, but head my warning – you will never get the correct foundation match in unnatural lighting, ever!  There have been many occasions where I’ve tried foundation on my jaw line, nose, back of hand, wrist, cheek (need I go on – basically I looked ridiculous in several streaks of colour), thought I’d chosen the correct shade and then hit the natural light of day only to realise that it is in no way, shape or form, the right colour at all!

Then there’s the brands that you’d love to buy, but can only get online and thus have no idea what shade to even start to contemplate as your match as you can’t colour swatch foundation online now can you?!  StrawberryNet has an amazing array of foundation brands that you can’t normally get your hands on in NZ and at incredibly affordable prices, however, it’s not exactly saving money when you buy a foundation that is completely the wrong colour for you with.  Enter…….. www.findation.com.

It’s so simple and from my experience with Findation, pretty damn accurate!  You basically enter the site, it asks you to input 3 or 4 brands you have used or are using currently (even including BB Creams) that you are happy with.  It will then bring up all the varieties within that brand along with all the shades within that tier and you hit the ‘Find My Matches’ button.  In about 2 seconds you are presented with an amazing array of all the foundation brands and shades that match you skin tone without even leaving your computer (or entering a badly lit store)!

Head along and check it out.  I loved it and thought you might too

Ange x


The Colour Wheel

colorwheel2

The Colour Wheel – this is as much of a wardrobe staple as the LBD, only, BRIGHTER!!

So, I don’t know about you guys, but me, I hear this sentence a lot when I’m out shopping……”I love this colour but it really won’t go with anything in my wardrobe” (maybe you’ve even said it yourself?!). Or, “this colour top/pants/skirt is gorgeous, buuuut, I’ll just buy it in black because black goes with everything”.  Enter, the Colour Wheel…..

This is a quick and easy guide to ALWAYS knowing what colours to team together and which ‘colour opposites’ attract!  To get started here are some easy steps to using the Colour Wheel. These combinations are the perfect ‘colour partners’ on the wheel:

1. Colours that form a 90 degree right angle with each other. e.g. green & orange; violet-red & blue; red-orange & yellow.

2. Colours that are directly next to each other. e.g. green & blue-green; yellow & orange-yellow; violet & blue-violet (basically, any colour directly next to each other goes, clockwise or anti-clockwise).

3. Colours that form a ‘T’  e.g. orange, blue & violet-red; yellow, violet & blue-green (you get the picture).

4. Colours directly across from each other. e.g. orange & blue; red & green; orange-yellow & blue-violet.

5. Colours that form an ‘X’  e.g. yellow-green, blue, orange, violet-red or orange, blue, violet, yellow.

Given brown is a neutral, rest assured it will go with pretty much any colour on the Colour Wheel.  As will black and white.

So, when you choose an item of clothing in a colour that has you a little baffled as to what you should partner it with, find it on the Colour Wheel and use the steps listed above to find it’s perfect colour combo!

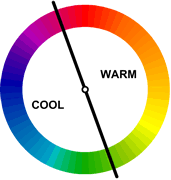
For accessories, team gold toned jewellery with ‘warm’ coloured outfits and silver toned jewellery with ‘cool’ coloured outfits (using the ‘Warm/Cool’ Wheel below).


Happy Colour-Combining xx


NAIL ART and Colours I’m Crushing On Right Now………


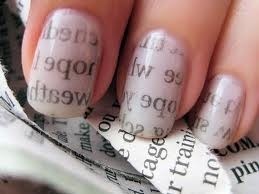
Newspaper Print Nail Art


Step by Step guide on how to achieve this look

What you’ll need:  1 base coat, 1 clear top coat, 1 nail polish colour, newspaper (cut into 10 little pieces to fit on your nails – trust me you’ll want to prepare this now before you get started on anything else), white/clear spirit (I used Vodka) and a small dish.

  1. Paint your nails with a polish of your choice, I prefer a light or neutral tone but anything will work
  2. Let your nails dry completely. This is a must or you will be in all kinds of trouble when you move on to step 3
  3. Dip your nails into a small dish of alcohol.  If you don’t want to use alcohol, water should work too but the letters will not be as precise as with alcohol
  4. Take a strip of newspaper and press it onto your nail while it’s still damp.  You can use just the everyday small print or you could choose a large print like a ‘headline’, It all depends on the kind of look you’re going for, but I think smaller print looks better.
  5. Hold the newspaper strip taut with a steady hand. If you try to lift the paper and put it down again or move too much you will smudge it.
  6. Peel the newspaper strip off slowly and gently.  Hopefully this is a voila moment
  7. Apply a layer of clear top coat  and you are officially newsworthy!


Neon Nails
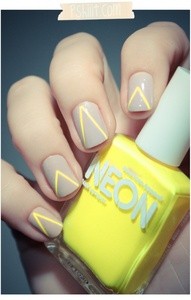
Neon is a trend I’m really loving – although I have to admit a splash of neon incorporated into an outfit is more my style, rather than an all out NEON ‘screams look at me’ outfit.  Why not incorporate it into an outfit with your nails – subtle – but still on trend!!

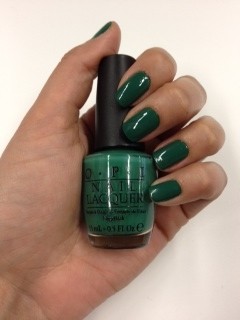
Jade is the New Black by OPI – wore on my nails all last week and lovin it!

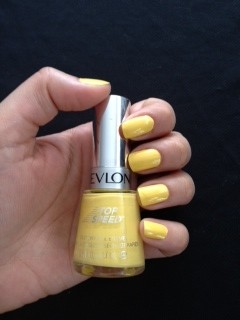
Revlon Top Speed in Electric
This is a cute colour, but as I do with all ‘top speed’ colours, you need to finish with a clear top coat to get rid of the matte affect and bring the true colour out.  Revlon’s new Top Speed Nail Enamel dries quickly and at $10 (on sale at K Mart at the moment), it doesn’t break the bank! This is a really close dupe for Chanel Mimosa if you’re not willing to splurge


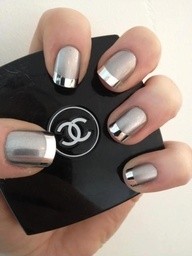
Sterling Silver
French Style Manicure in Matte Silver and Metallic Silver.  One of my fav nail looks and the perfect nail art to wrap up today’s nail looks.